A Never Ending Process of Improving Things
Yesterday one of our members Thomas Narolewski made a comment to me that I think perfectly sums up growing exotic hibiscus. It is a never ending process of improving things.
This is very true when it comes to such things as what fertilizers you use and how much and how often, sprays and systemics for pest control, when and how to prune and finally of great importance what soil to use. And add on the fact that no one I knew of anywhere when I started had these type of plants planted in ground all year round so I had no guide or model to follow…
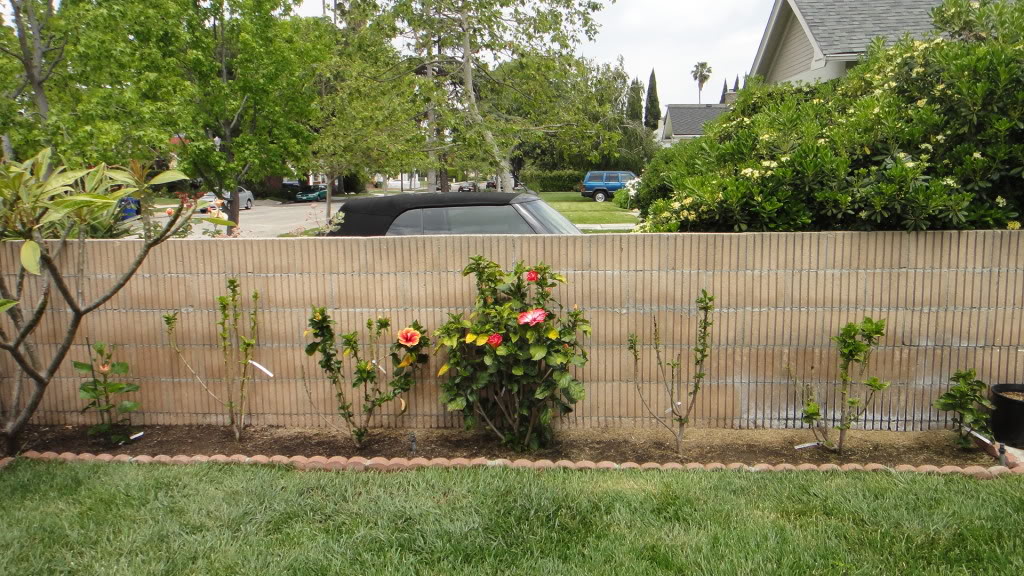
I originally planted them when they were tiny baby rooted cuttings back in April 2010. At that time I made modest sized holes in my super heavy and wet clay soil here not realizing they would quickly out grow the holes. Here is a photo of what they looked like after 8 months after being planted. I would guess the larger ones were probably over a year old when I had them shipped to me.

That first winter was a disaster once the temps were cold at night and we went through a few rain events. All my beautiful plants lost all their leaves and looked like stick skeletons. This photo was taken in April 2011 after a winter of hardship for them.
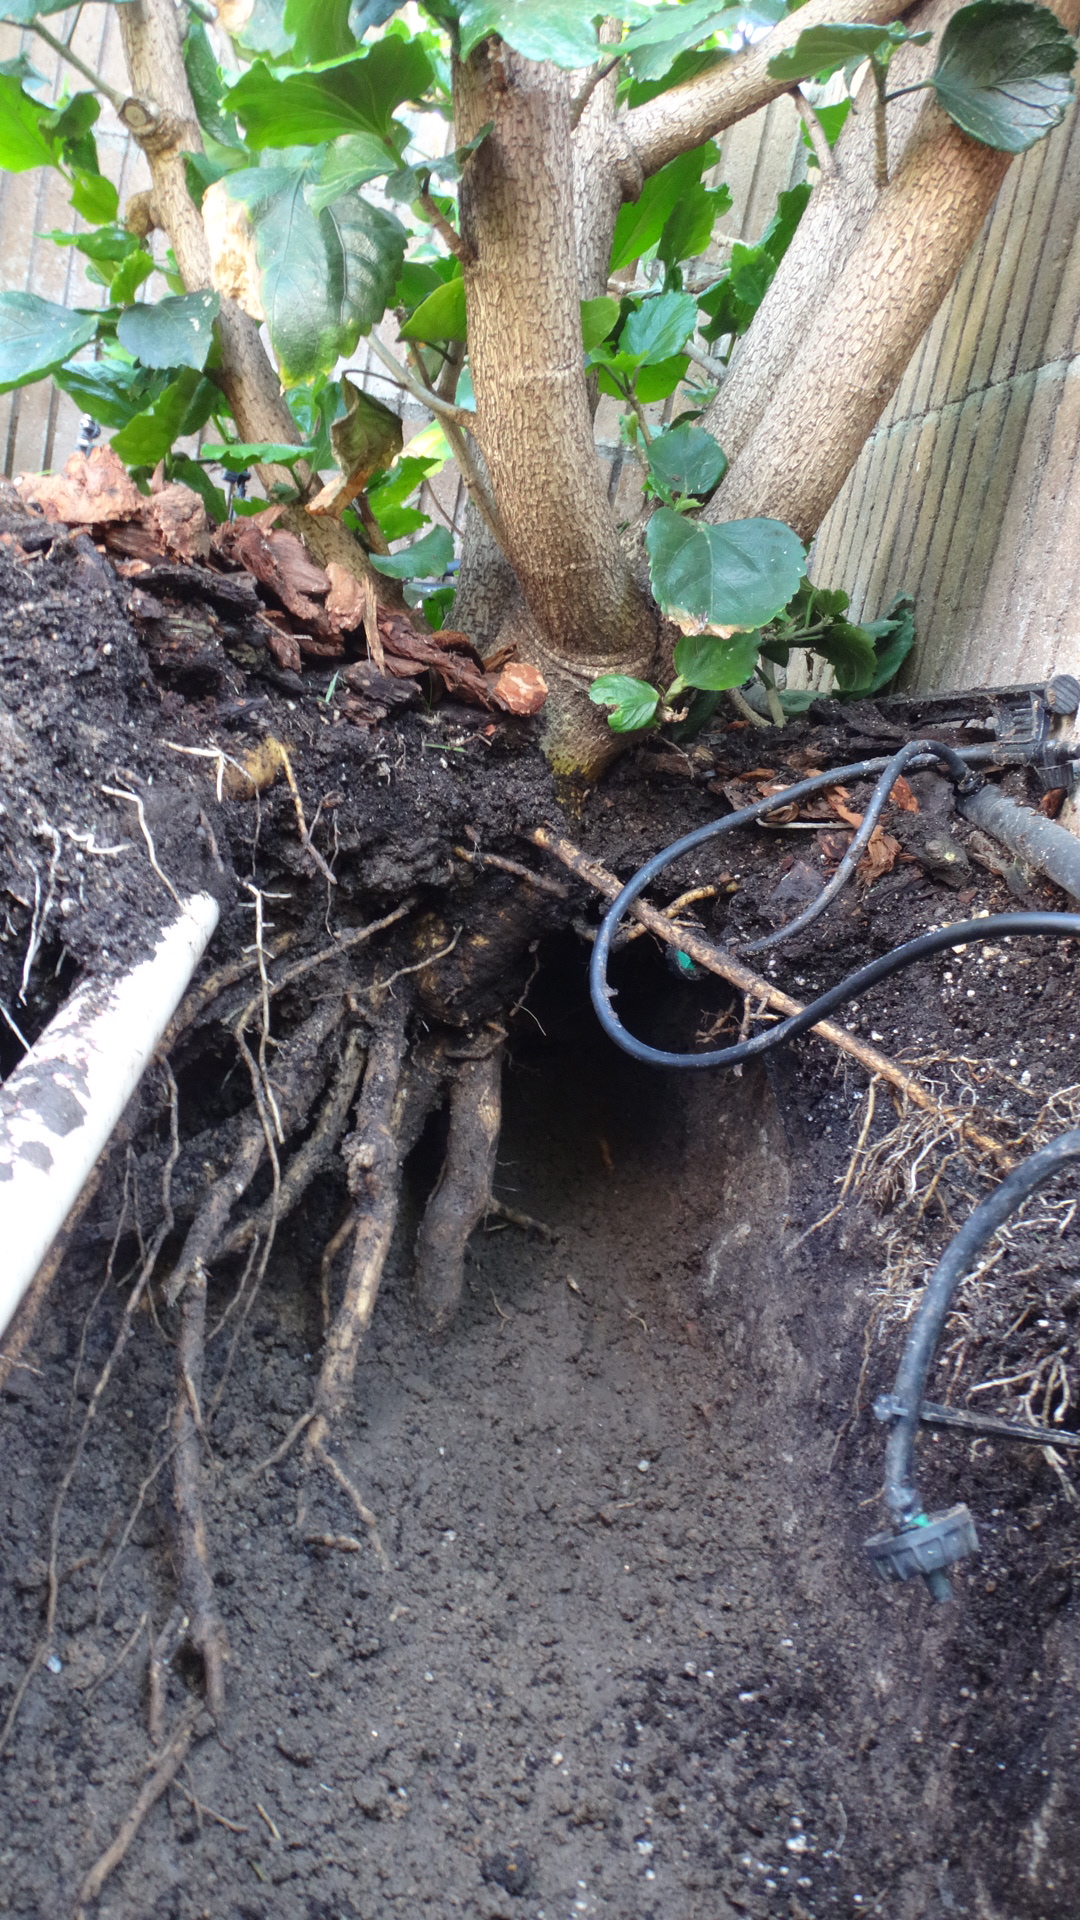
So I learned the hard way that I need to change the soil in the holes I dug. So I started digging thinking I would dig up each plant and fill the original hole with better soil. As I kept digging I discovered that my plants had quickly grown dominant roots way down into the horrible clay soil. After digging down more than a foot I realized that there was no way I was going to gently remove my plants. I was trying my best to avoid cutting any large roots that would send them into shock and risk them possibly dying. So I compromised and decided to excavate the soil all around the rootballs and leave the dominant roots as they were. Not easy work as I resorted to using my weeder as an improvised pick to carefully chisel out the clay. Where the clay was dry it was like chiseling out cement. I have never worked so hard in my life! So this is what I ended up finding as acceptable. In the end I just removed all the soil down to a foot or foot and a half and made one long trench to fill in with the right soil.
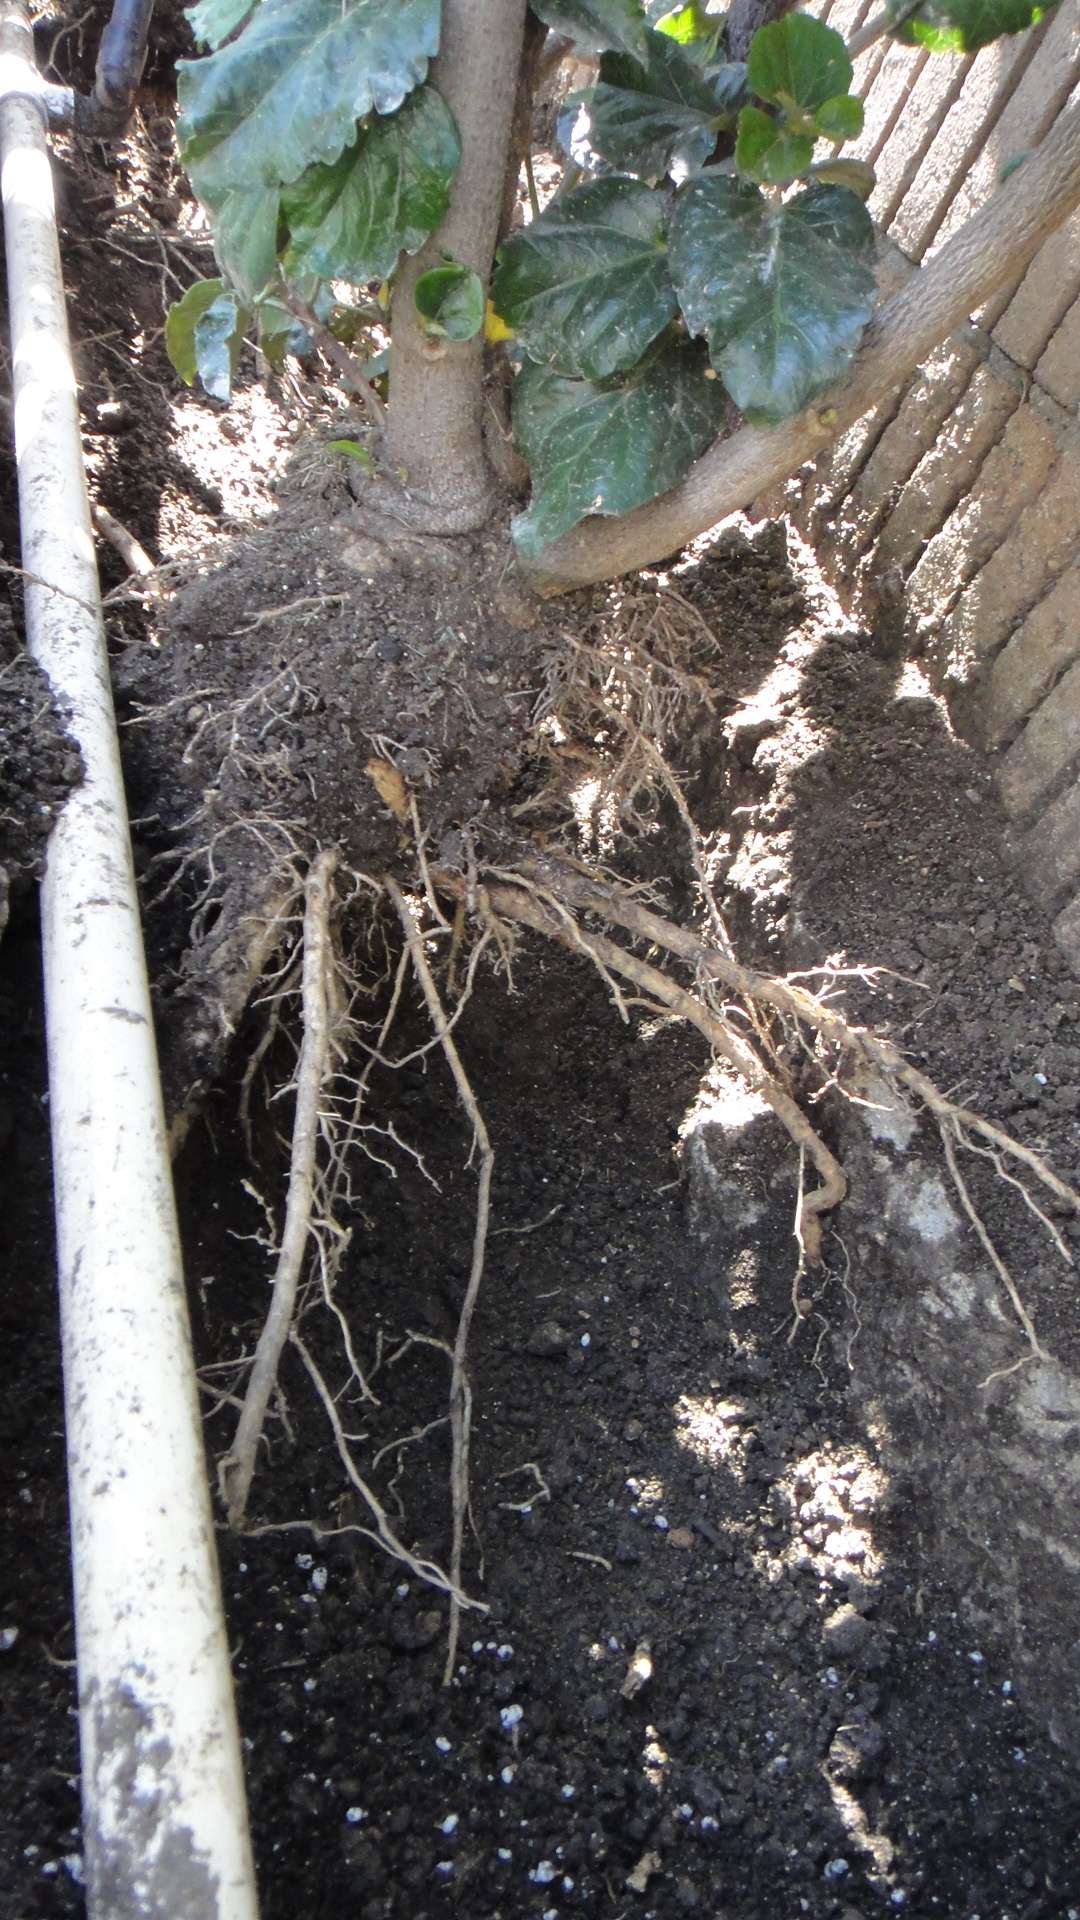
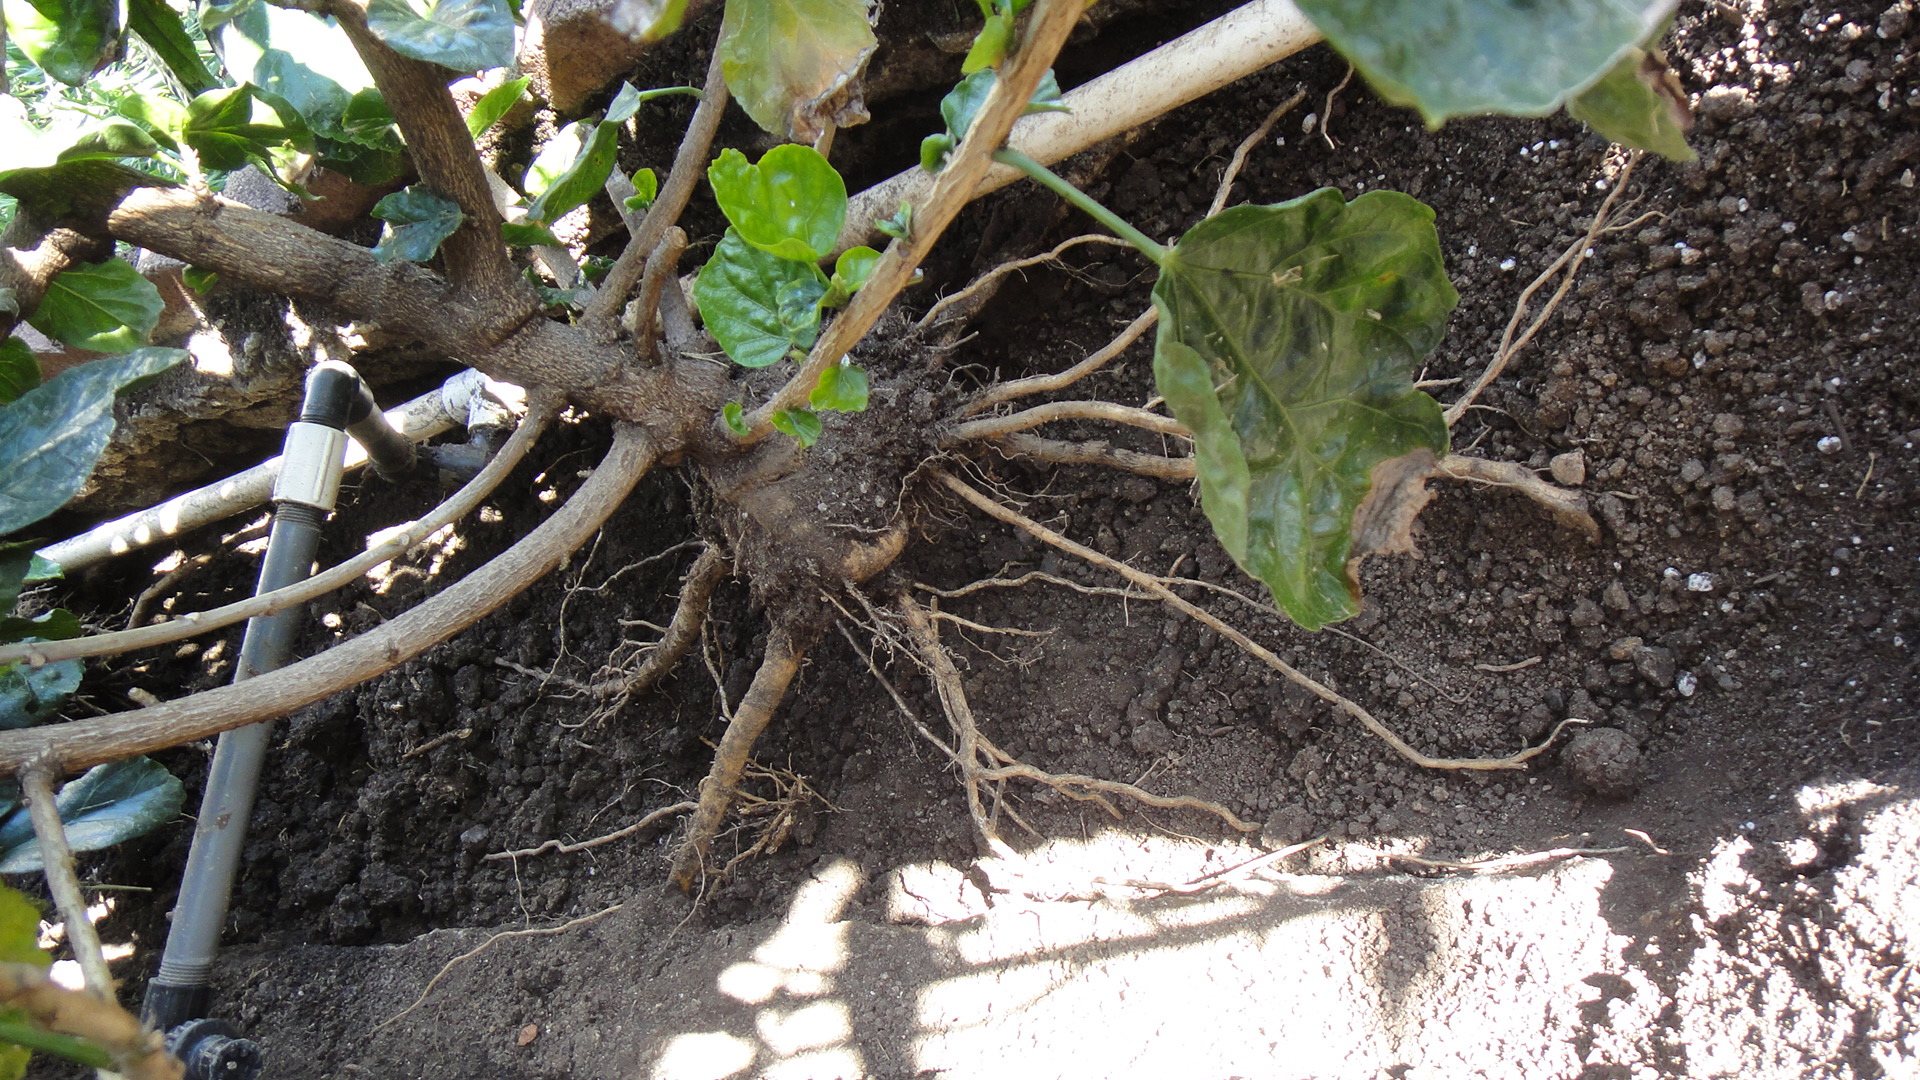

Note how retarded the growth of the rootballs were with the fine feeder roots due to the heavy clay soil. My plants were really starved for air and had very little in the way of feeder roots to take in nutrients.
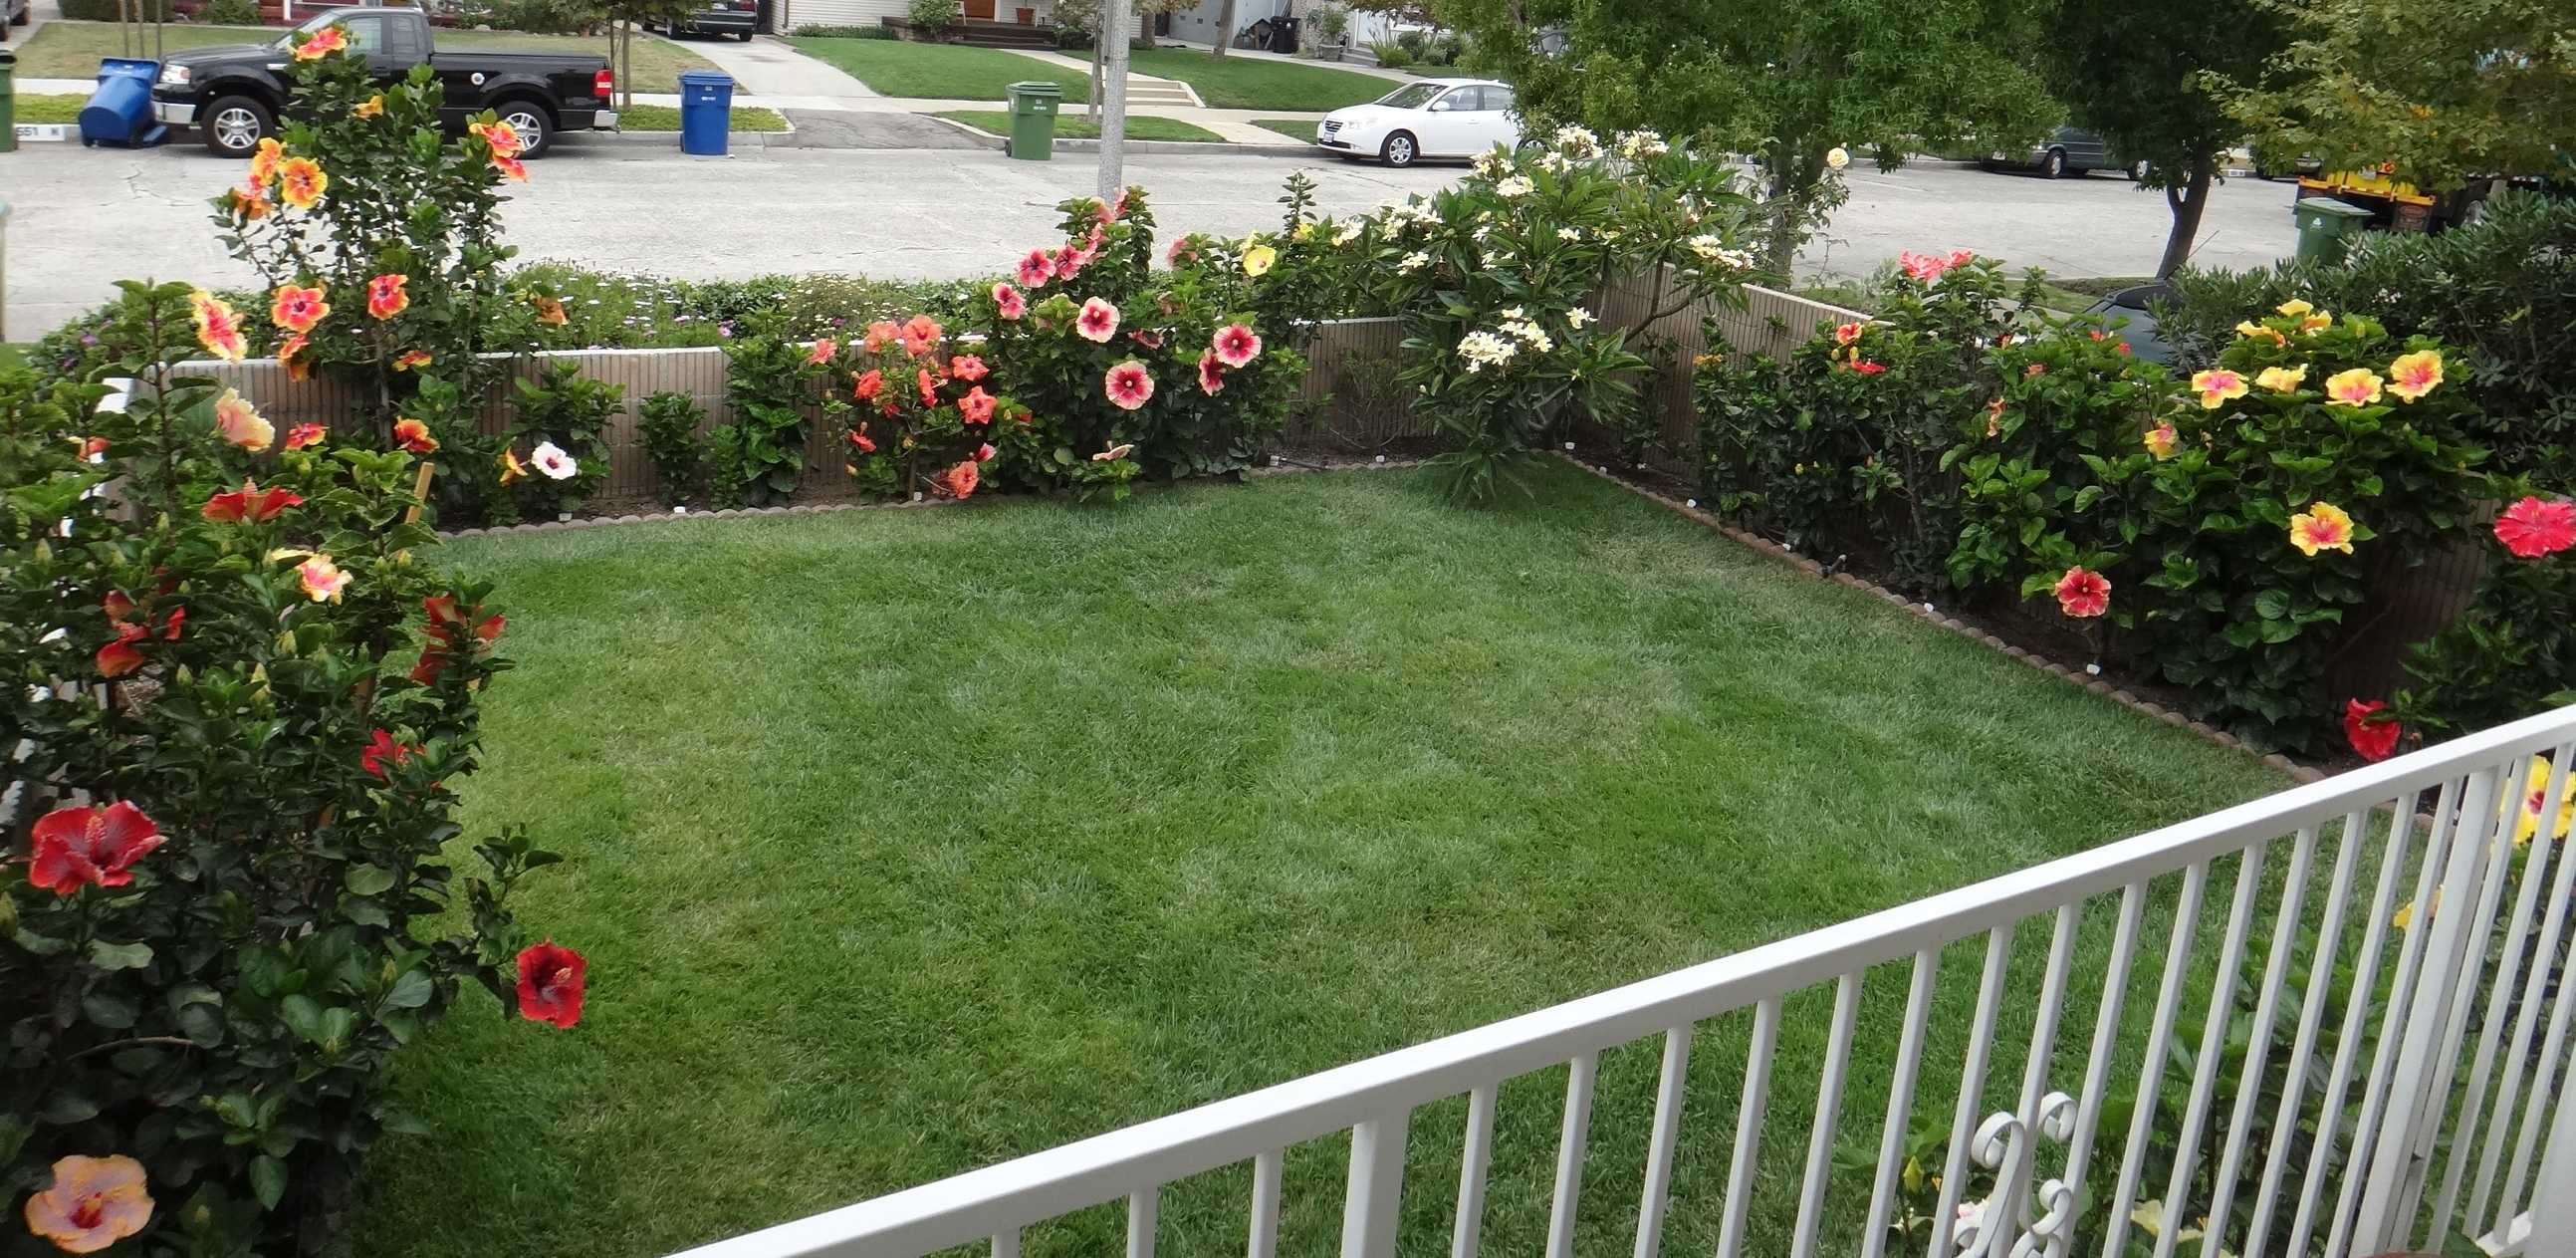
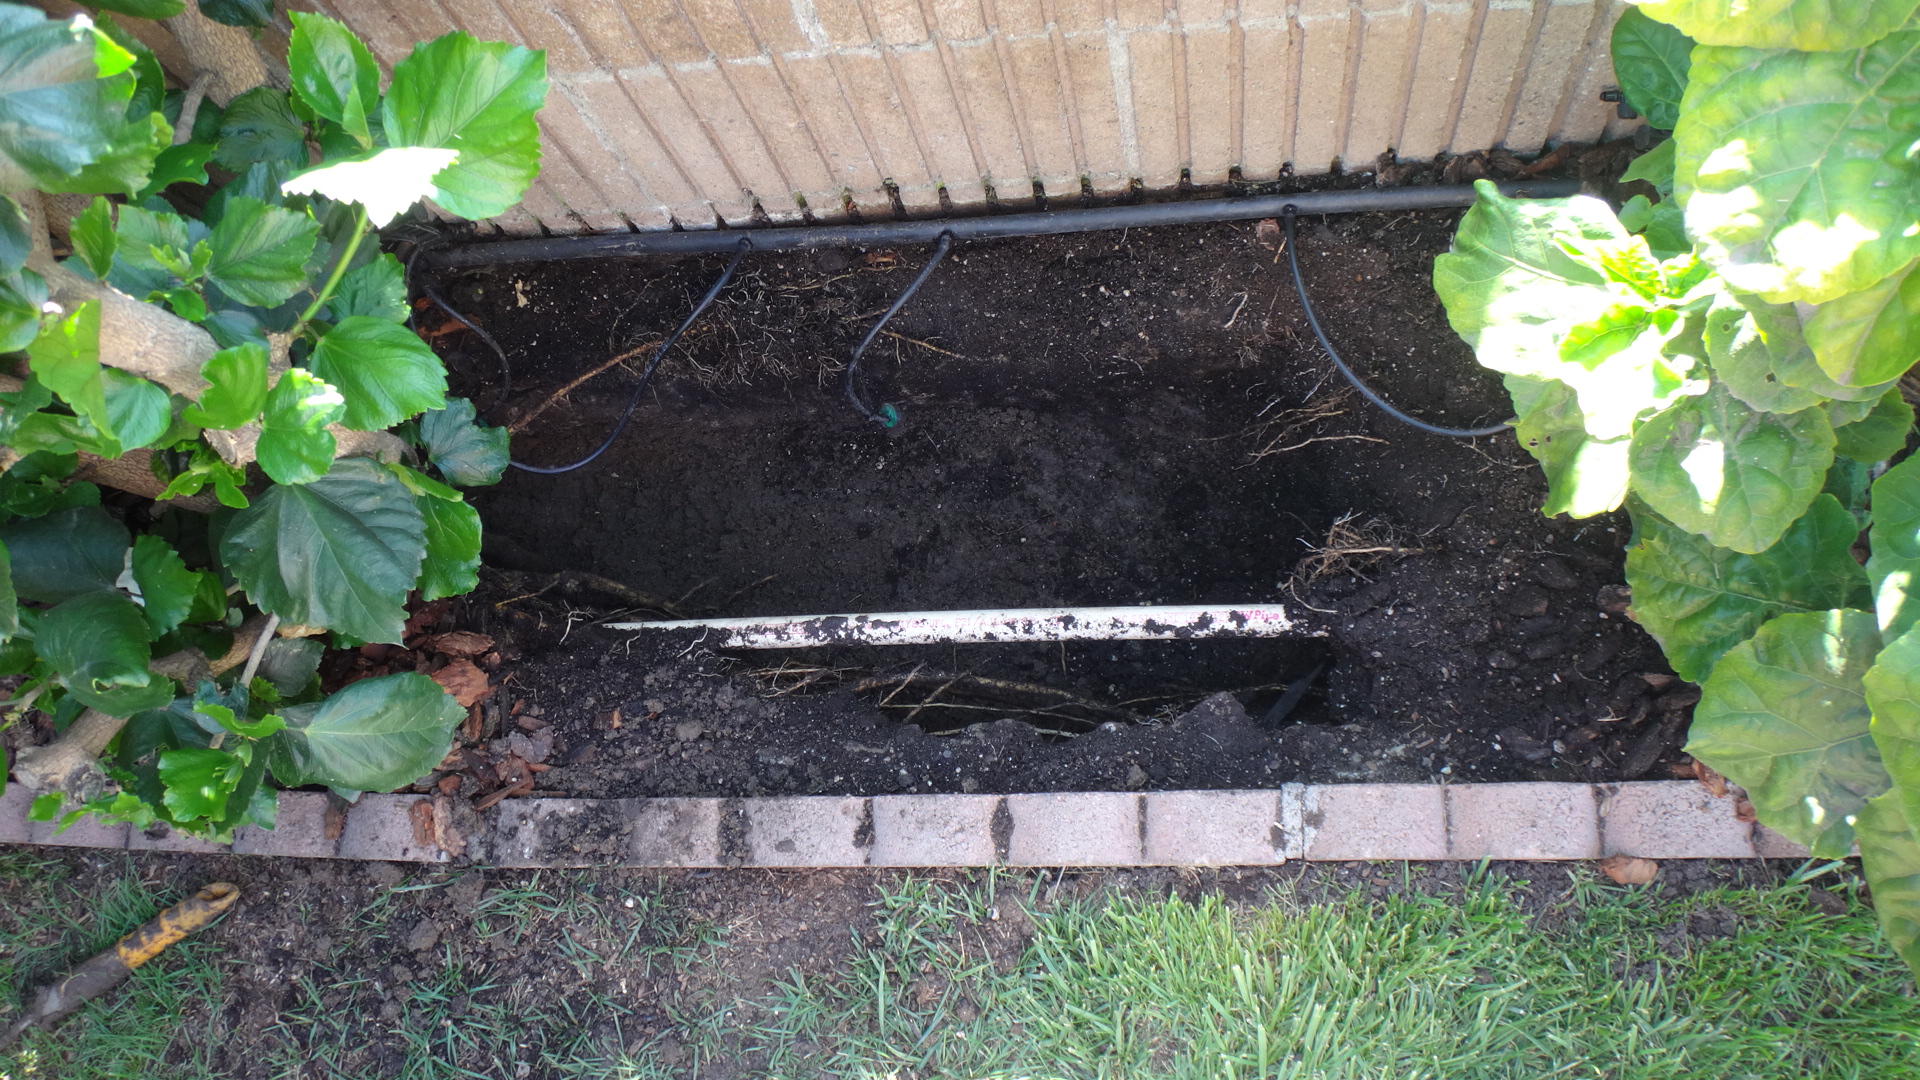
After filling all the planters with better soil the results were impressive – this is just four months later.
So you would think that is the end of the soil replacement story for me. I thought it was but over time the never ending process of improving things has so some really unexpected turns that you are always learning something. As I added more and more plants and planters it got to a point that I could no longer hand feed all my plants so I finally decided to install a drip system with a fertilizer injector to automatically feed them. That is a whole other story in itself that is still unfolding but for another time!
Once I got my drip system perfected a whole new issue has now popped up. It turns out the soil that I used back in 2011 is too dense. It has no coco coir and not enough perlite to create enough air pockets for the roots to breathe. As my drip system really soaks the soil with fertilized water the air pockets are eliminated and my plants start to struggle with yellow leaves, dropped buds and worse case scenario root rot. After doing some more research and experimenting I finally found the right soil that can handle the drip system. If I knew then what I know now I would have avoided this but I am not even sure the soil I found was even available back then. That is how the never ending process of improving things works.
But there is one final step in this process which is sharing this information with other passionate growers. That is my mission!
So now I am starting to replace the current soil with the new one I find works perfectly. Here is a photo of my Love Sonnet. You can see the rootball is pretty small for being planted in the ground for a year now. Note the lack of leaves and the yellow they show – the soil just isn’t working for it.

So same process as four years ago – I removed all the soil and even went under it’s neighbor Acapulco Gold.

You can see that lovely clay soil at the bottom of the planter. It isn’t all bad as I have learned it provides my plants with a never ending source of moisture so they will never be thirsty. But the root ball above needs lots of air and nutrients being showered upon it.
It is a lot of work but the results are just amazing – well worth the blood, sweat and tears!
Who thought such a little space could be so full of learning and great opportunities? I now always look forward to the never ending process of improving things. Seems the sky is still the limit – what fantastic plants these are!