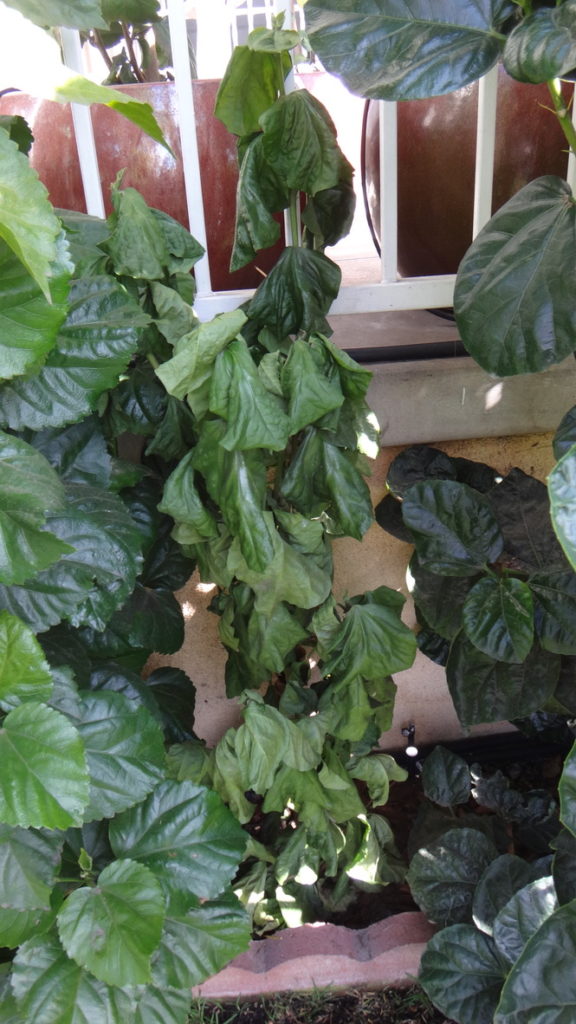
Leaf Wilt
Two types of wilt for hibiscus
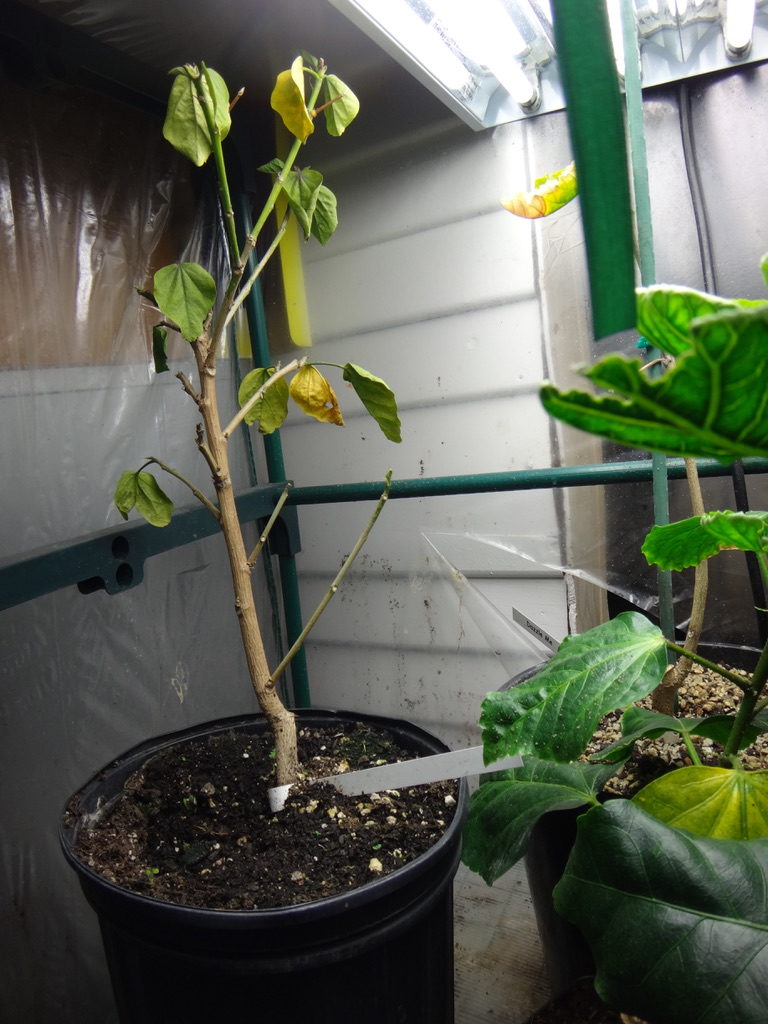
Cold Shock – Systemic Wilt
If you see all of the leaves on your hibiscus plant all of a sudden start to wilt from top to bottom this is a sign of cold shock. Your plant has gone past the tipping point of what it can handle in regards to cold temperatures and/or lack of air in the soil. This can occur overnight where the day before your plant looked healthy and strong and the next morning it is completely wilted. This can also happen over the course of a few weeks where the wilting worsens by the day until all the leaves are no longer viable. If you see this happen during the warmer months of the year your hibiscus plant could very well be experiencing drowning where it has been overwatered to the point where the soil has gone from having ample air in it to none in the course of a very short time frame.
If your hibiscus plant is experiencing systemic cold shock and is in a pot immediately move it to a location where it can get as much heat and humidity as possible. Many growers in this situation will bring the plant inside their residence. The problem with this is that during the cold months is the heaters we use to heat our living spaces dry out the air to extremely low levels of humidity. This will then be another significant negative hit for your hibiscus that is already in a very fragile state. We have seen most plants brought inside after going into cold shock eventually die from this double dose of inappropriate climate conditions. So be aware of this risk and take steps to give your plant the humidity along with the heat it needs to stabilize itself so that it can eventually reawaken.
Do not cut off or prune down branches at this point. That is like amputating an arm on a person who has pneumonia. Your plant does not need any more trauma or negative inputs. Smaller plants many times will not survive systemic cold shock and that is why we recommend to keep all smaller hibiscus indoors away from cold temperatures during the colder months. Also in regions like Southern California we get strong wind events which are just as stressful for hibiscus as the cold as these events are many times not only cold but worse have severely low humidity percentages. Just that combination is enough to send your plant into systemic cold shock in one night.

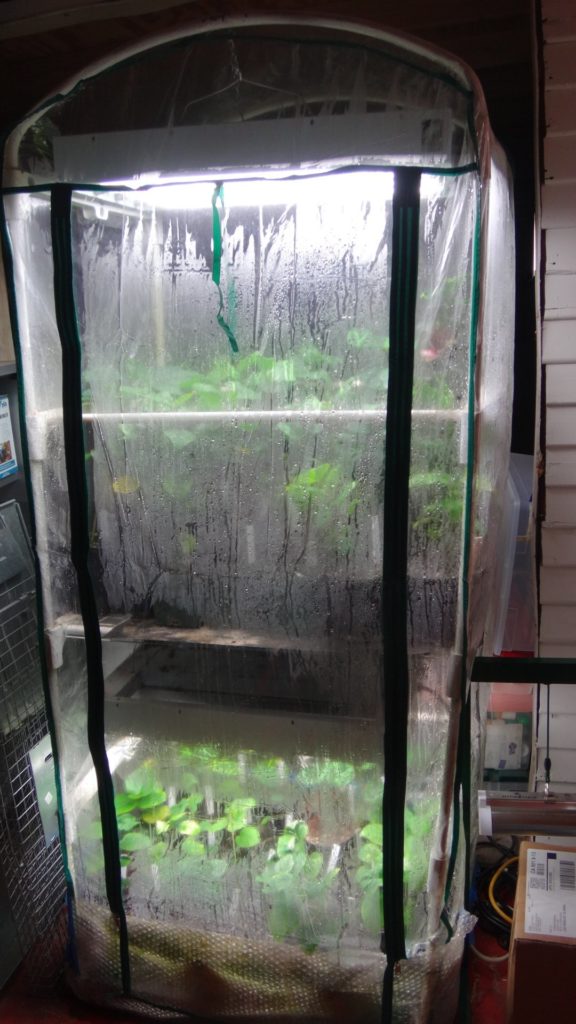
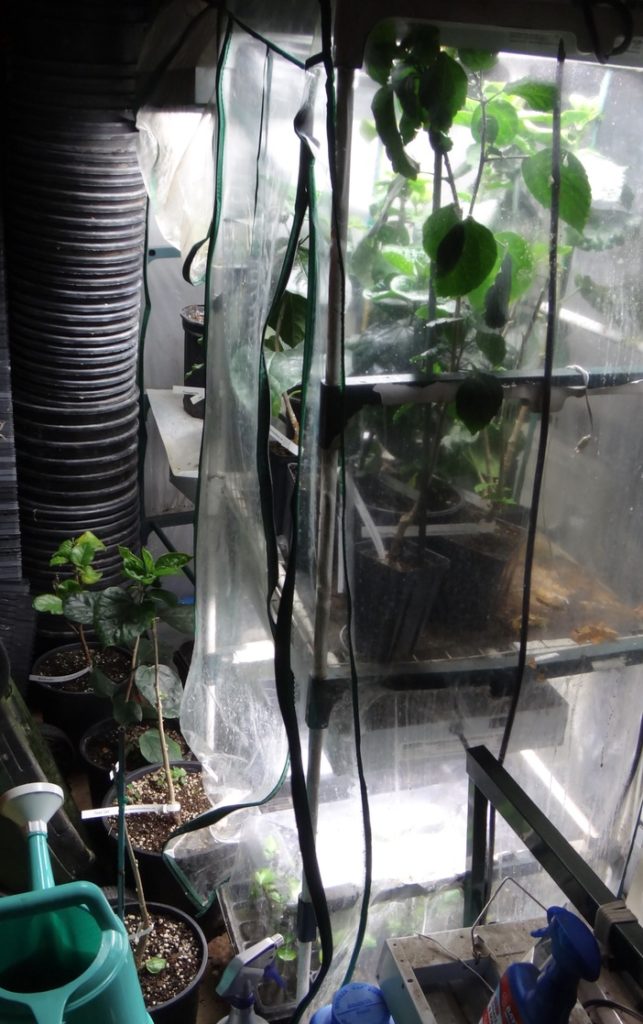
It really helps to be creative and find ways to give these plants an indoor space with heat and humidity during the cold months. You have seen this example on other pages here but just one easy way to achieve the right conditions for those plants that have shut down or are struggling or best yet never have to endure such conditions and thrive all winter long. Get creative, there are many ways to achieve a happy indoor growing space for your hibiscus.
What To Expect & Do After a Hibiscus Has Systemic Wilt
As we stated above the first thing you need to do if your plant is in a pot or you want to gently dig it out of the ground if possible is move it to a location that has lots of heat and humidity. Unfortunately moving it to a more protected outdoors location doesn’t really qualify but if that is all you have for your options by all means do that at a minimum.
An indoor location where you have the ability to add in the heat and humidity is needed because your plant will want that 24/7 to start to recover and rebound. Remember hibiscus are momentum plants and when they go into shock it doesn’t magically stop overnight if you move it out of the cold conditions. They cannot stop on a dime like a car with anti lock brakes. They are more like an old mining car where the miner manning it has to apply that hand brake and it makes sparks and the car takes quite a while and commotion to finally come to a stop. Your hibiscus needs to slow down the shock and eventually calm down and stop declining. The warmth and humidity will do this but it takes several weeks if not a couple months minimum to do this if it has optimal conditions around the clock. Then once the negative slide has ceased it will start to reverse direction.
So when you move your plant indoors with all those wilted leaves you should prune off those leaves as they prepare to drop off. Don’t prune them all off at once when you first move it indoors. Some leaves usually near the top might make it and you want to give your plant every chance to retain any leaves it can.
Wilt Disease from Root Rot
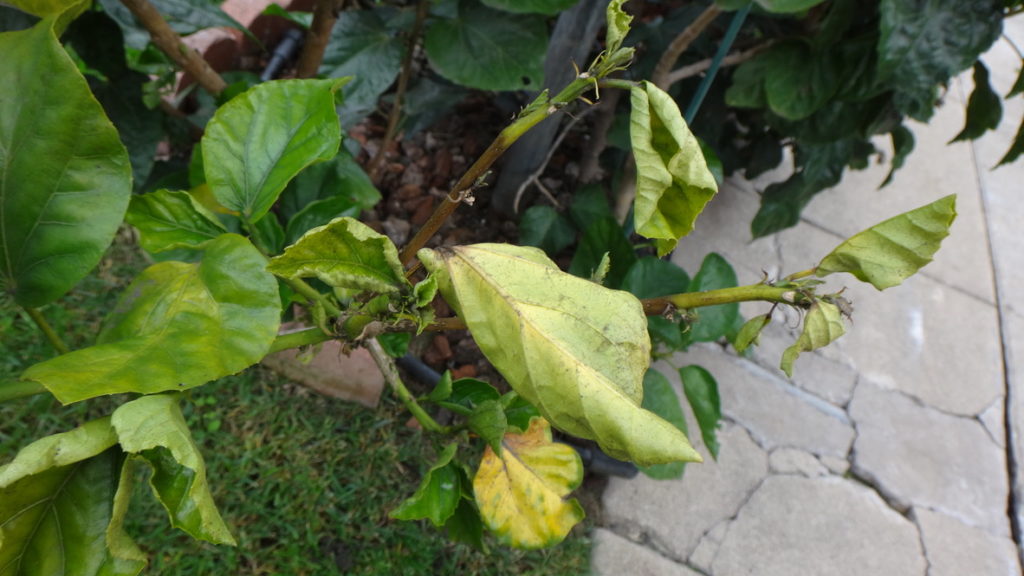
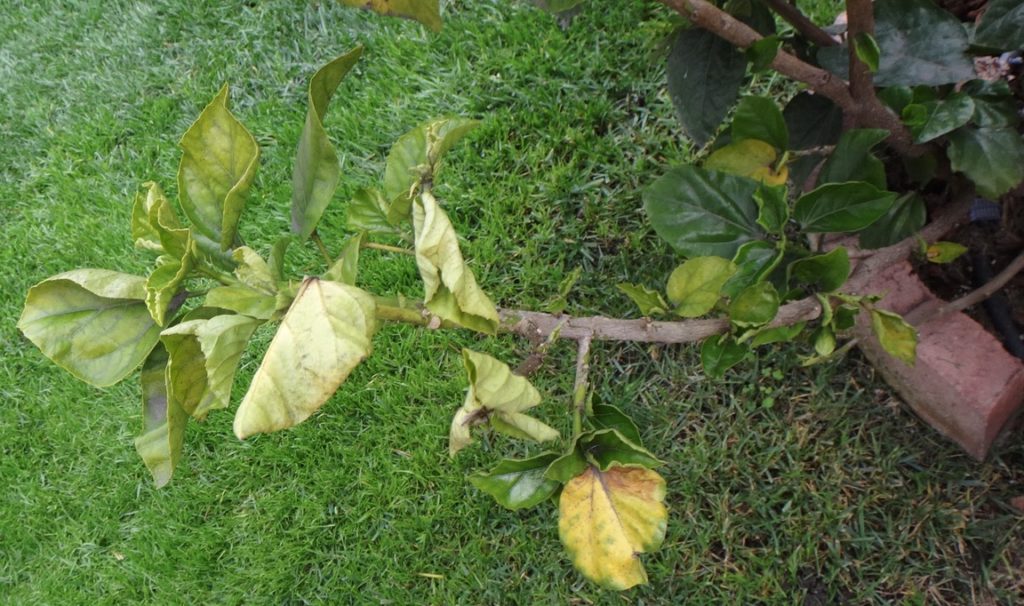
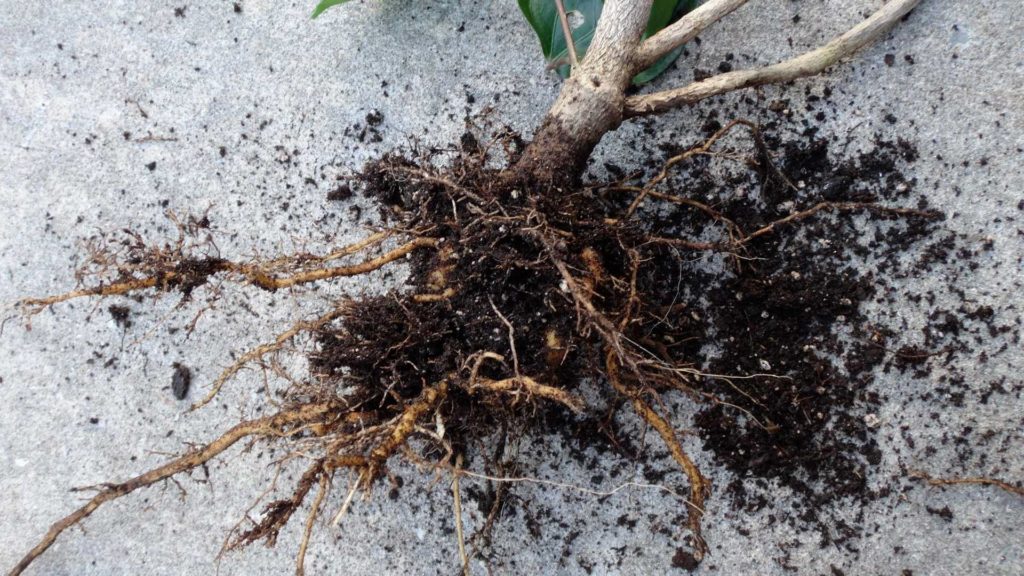
The other way you will see wilted leaves on your hibiscus plants is from root rot. There are a several key differences you can observe that will let you know that you are dealing with root rot instead of systemic wilt from cold shock. Obviously if your plant starts to experience wilt during the warmer months that is a sign you have an issue with your roots. Wilt from rot in the roots means that as the pathogens from the fungus or mold from the soil spread into your hibiscus’ roots they will increasingly block the nutrient uptake channels. Over time your plant will become more deprived of nutrients and as it can carry up less to the entire plant the effects start to show.
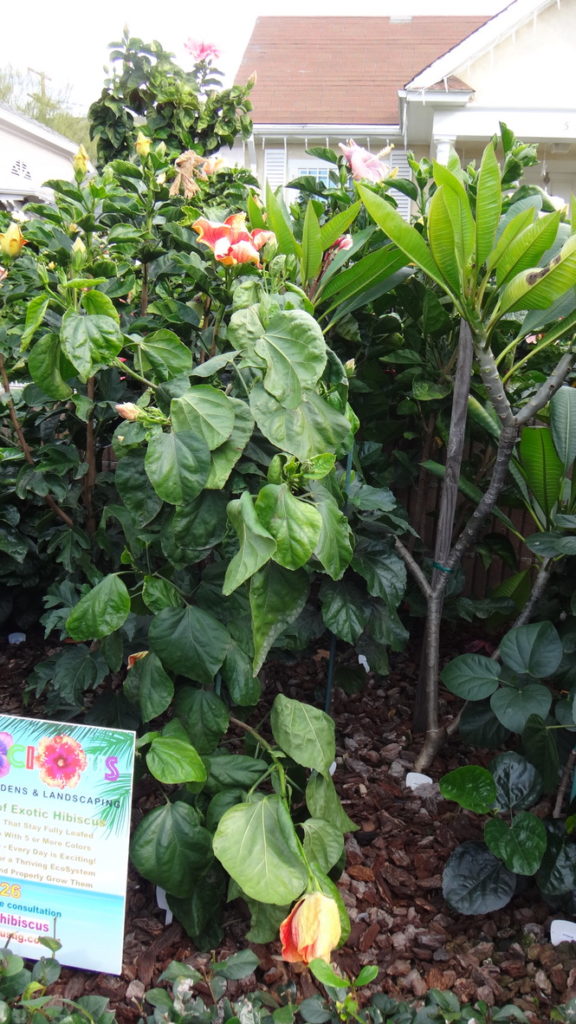
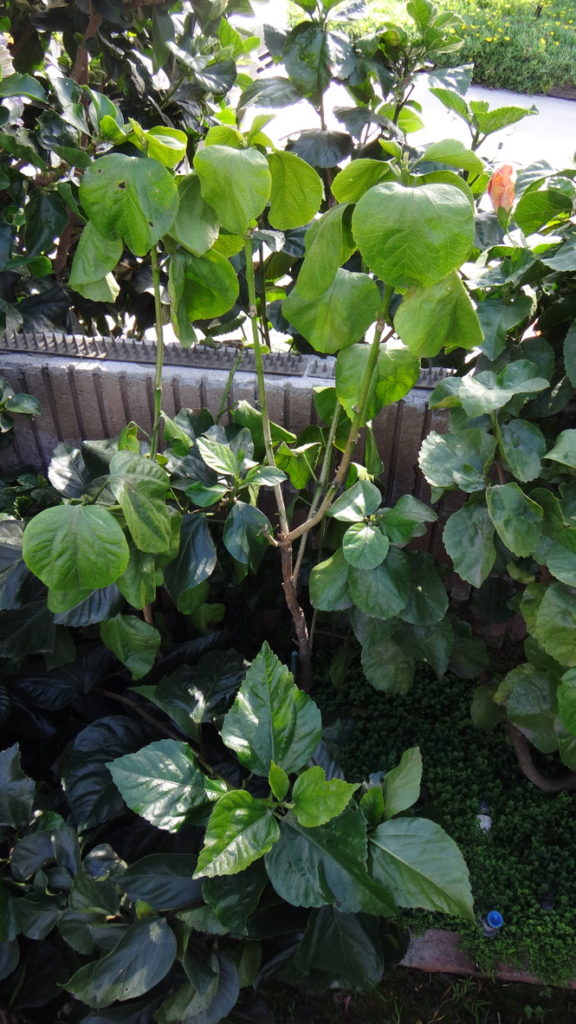
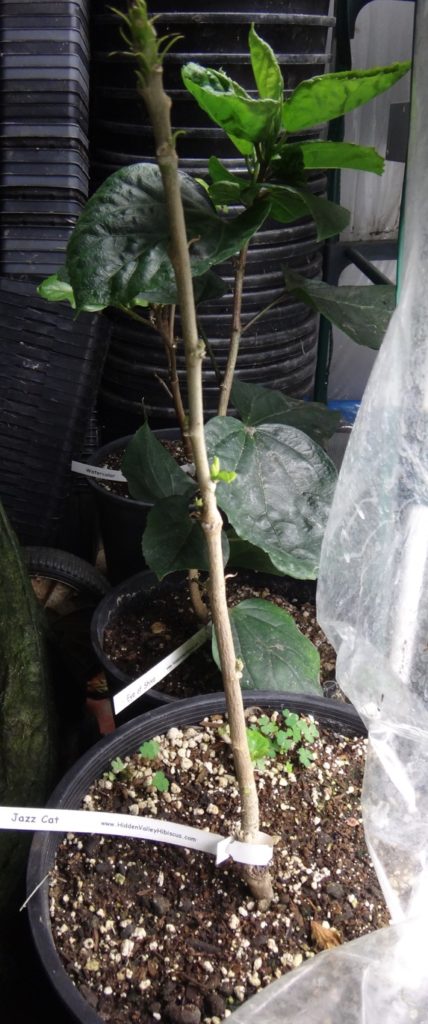
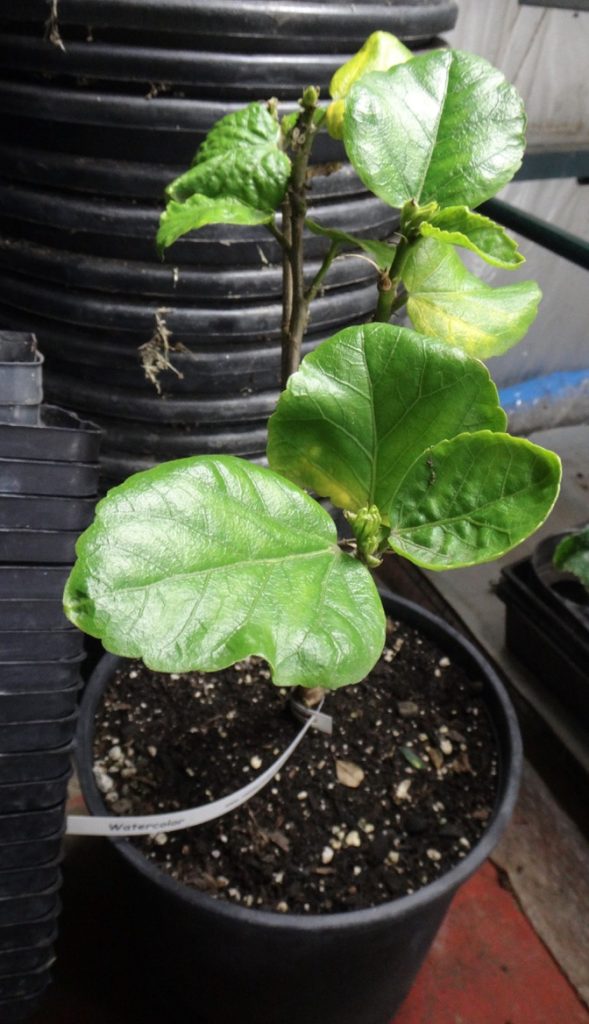
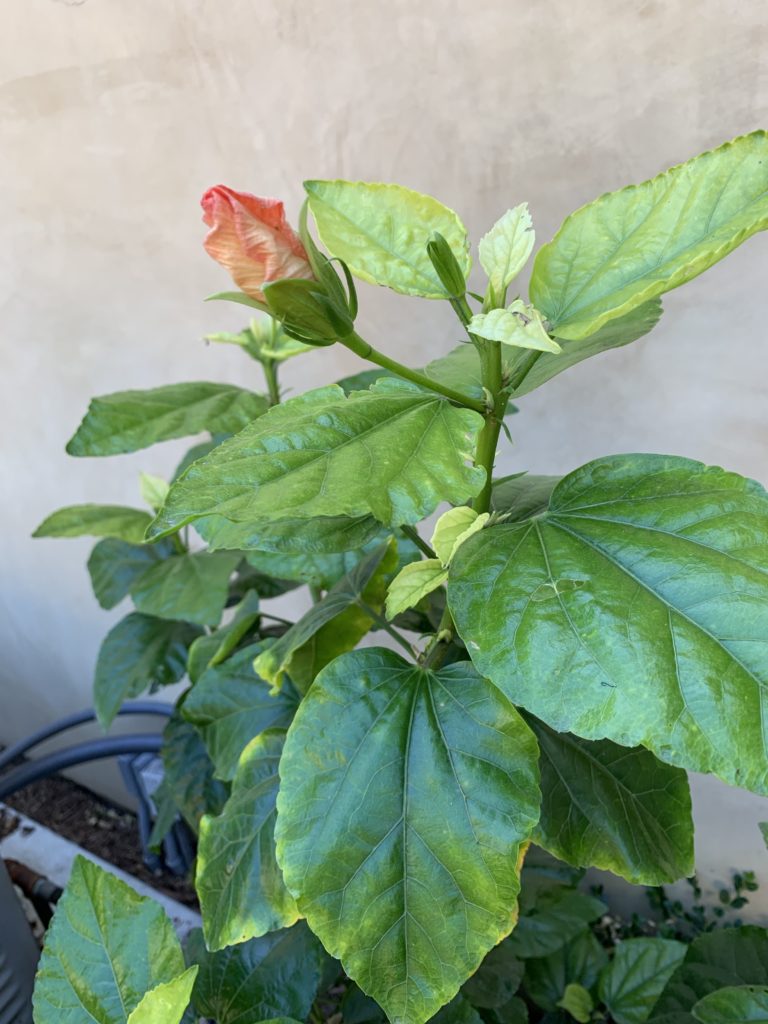
The first signs of this is typically observing that the leaves of your plant, especially the top leaves of branches become veiny and pale in appearance. You will then notice your hibiscus will start to lose the lower leaves on it’s branches. Slowly over time the limp leaves and leaf loss will work it’s way up your plant leaving just the top leaves on branches. The final stage is the branch tips will start to die back as the plant now cannot even get enough nutrients to keep the branches alive. It is a slow and torturous process your plant will go through. But that is the key, it is a slow process that takes months if not years to come to this sad conclusion. Unfortunately hibiscus have tender root systems that need lots of air all the time so this is the most common way they die. The worst time of year for this is winter when the wet and cool conditions are perfect for these nasty pathogens to be the most active and dangerous. Remember hibiscus evolved in tropical climates so they have very little defenses against cold seasons and the risks that come along with them like pathogens that flourish at a time when your hibiscus is already struggling with weather conditions it is not meant to be in.

Attempting to treat root rot
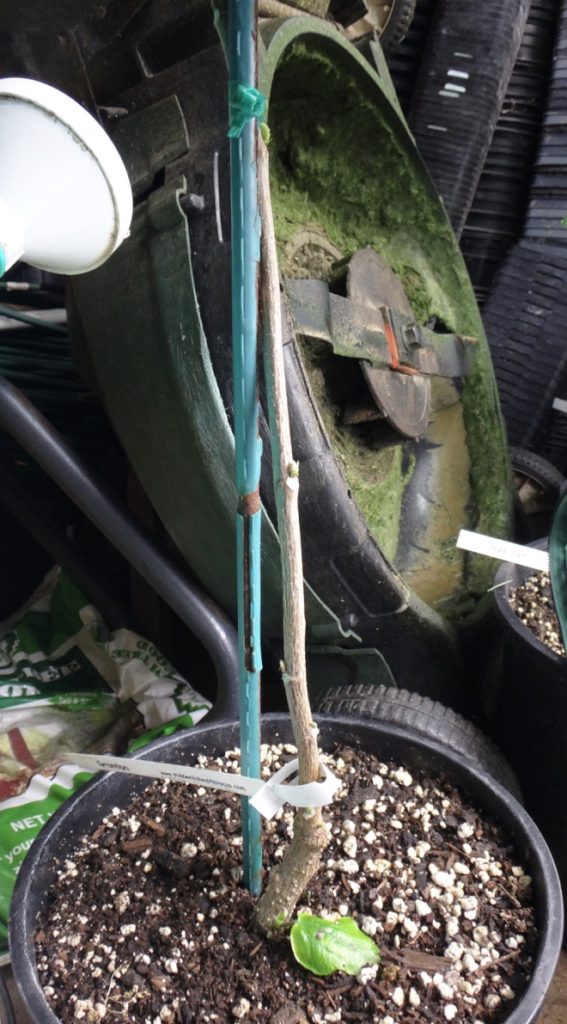
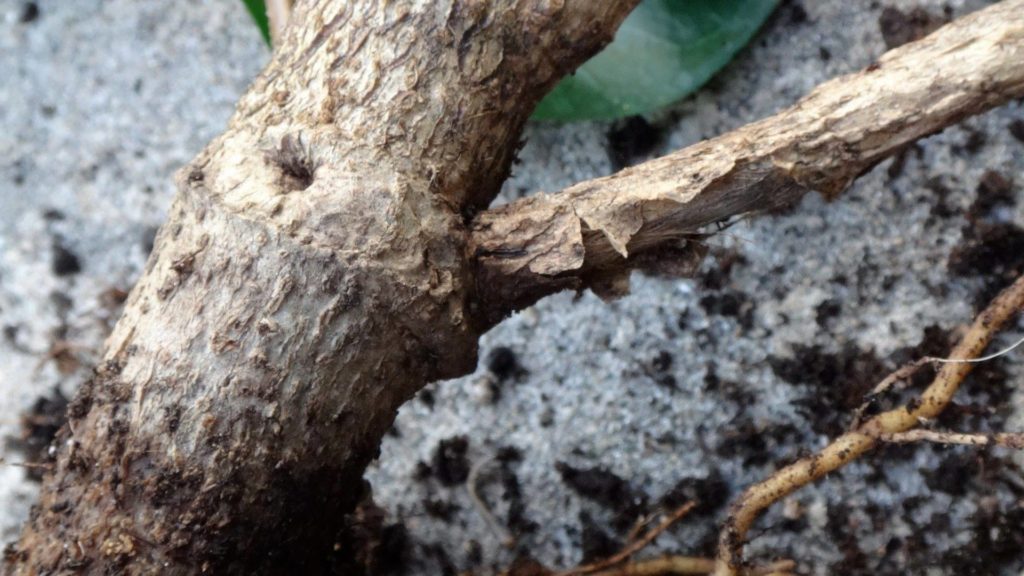
There is nothing worse your hibiscus can get than root rot or rot around the base of the main trunk. The reason why this is such a challenging scenario is that once the pathogens get inside the main trunk of your plant there really is nothing you can do at that point. If you inspect the main trunk and see no evidence of rot then chances are it is in the roots. The only method we have used that has had limited success is to bare root your plant and clean the roots the best you can.
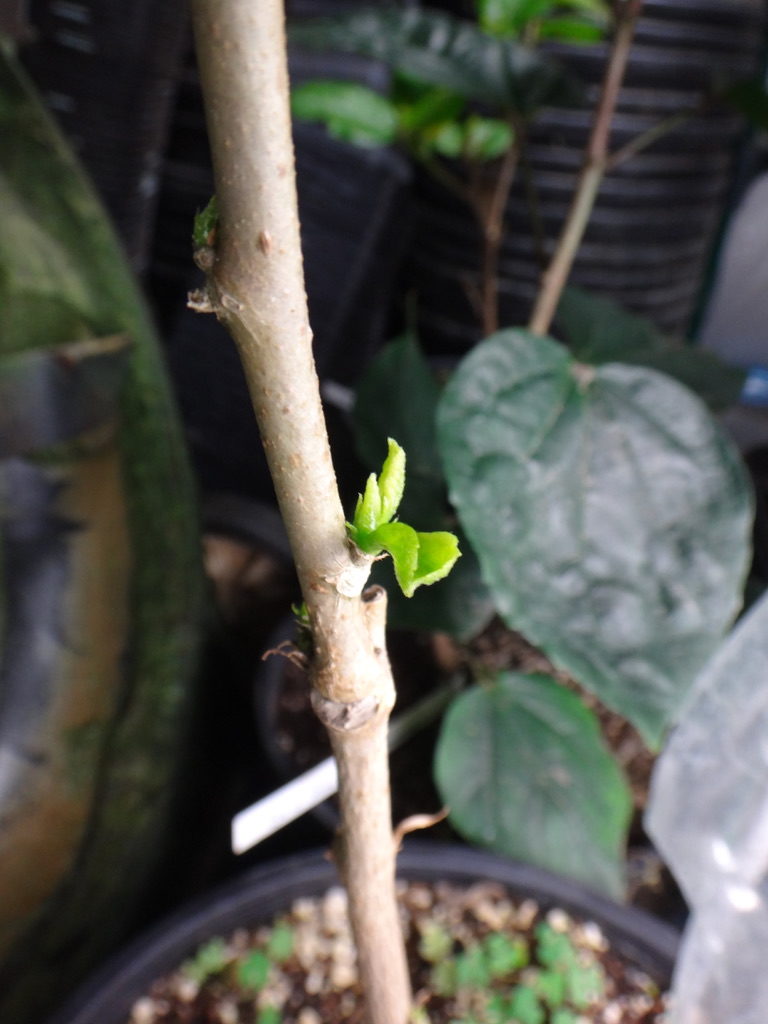
Bare rooting and washing the roots
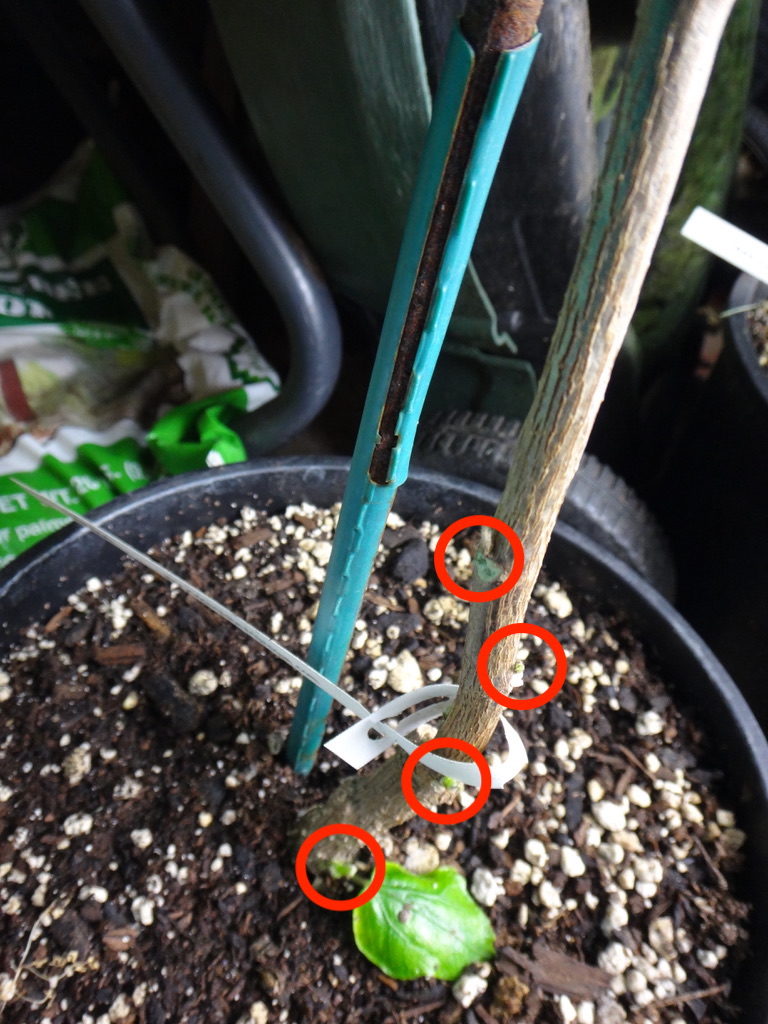
This sounds easy but actually it is a precise process that demands careful attention. First anytime you uproot a plant or remove it from a pot you have to be as gentle as possible to not disturb the roots the best you can. That is really impossible since we are going to be working on the roots but do your best to use a gentle touch. Once you have your plant out of it’s original growing space you need to gently shake off all the soil. Do this only in the shade – direct sunlight will kill roots very quickly. Once your roots are free of soil you will want to carefully examine them for any sections that are rotted. If you find any you will need to cut them off.
YOU HAVE TO DISINFECT YOUR PRUNING SHEERS AFTER EACH CUT OR YOU RISK INFECTING ANY NEW SPOT WITH EACH NEW CUT.

You can use alcohol or bleach to disinfect your sheers after each cut of rotted roots – the same goes for any dry rot section of a hibiscus you cut above the ground too. Also this is your chance to check directly underneath the main trunk of your hibiscus plant. Many times rot can get going there and that is one place you do not want to find rot. If it is rotting on the underside of your main trunk your plant is doomed. Once you have finished pruning off all rotted roots the next step will be to gently wash the roots in a 10% bleach solution. Do not use soap or detergent – that can also do great harm to your roots as well as any leaves on your plant that it might come into contact with.
After washing the roots make sure to give them time to dry. This is a tricky part too as wet roots are a prime growing location for those nasty pathogens to keep on going. Just because you have cut off all rotted roots and washed them chances are there are still rot pathogens on your roots. So you want them to get as much air (shade only) and dry out but not completely dry out. That is the tricky part – you want them to still be moist. If it is a hot day you can mist them if they start to dry out before you replant. Air is a rot pathogens worst enemy so the more air they are exposed to the better chance your plant has to survive.
Replanting your cleaned up hibiscus
Before you replant your hibiscus there is another critical step that needs to be taken to give your plant the best chance of making it. You need to dispose of all soil and sanitize your pot thoroughly before replanting. The pathogens that cause rot can be on any surface and/or in the soil and will make their way back to your plant. If your hibiscus was in the ground you will need to remove as much soil as possible in that growing space in hopes that you have eliminated the pathogens. Realistically this is hard to do and overtime it is likely that your plant will have more pathogens attacking it down the road. With potted plants your odds are better as that is a controlled environment with limited space.
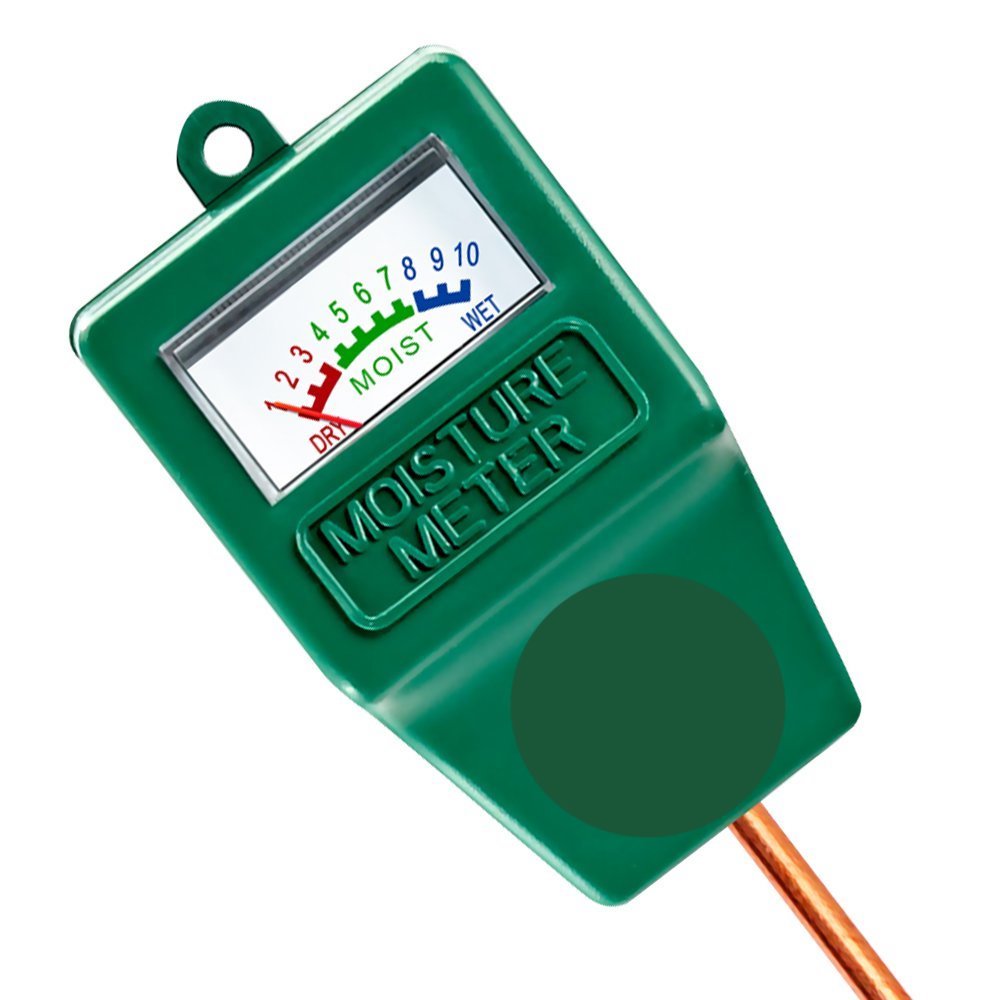
So fresh soil and a thoroughly sanitized pot (pure bleach only) to start. Once you plant your hibiscus do not pack the soil tightly. You want to leave as much air pockets in the soil as possible so lightly tamp it down. Second thing is not to water the soil much as well. You want it to be moist but not wet. It is a tricky balance and depending on the time of year you might have to lightly water your rescued plant daily as the soil might dry up completely. Use a water meter to make sure that deep down it is not getting too wet. One strategy you can use is to place wood chips or something similar on top of the soil to hold in the moisture. This also helps with weed control too.
Summer surprisingly is the time we see the most root rot
Even though the pathogens that create root rot flourish in cold and wet conditions which means November – March in Southern California we actually see it with our members the most in late summer and early fall. The reason for this is simple: During hot stretches of weather many growers tend to overwater their hibiscus especially those in pots. Heatwaves are great at drying up the top layer of soil but deep down especially in larger pots it can stay wet. Our eyes see that dry top soil and feel how hot it is and we get to watering those hibiscus a lot during such stretches. The key is to use your water meter. Slowly probe it down and watch the meter to see as you go further down if your soil is wet. You will be surprised how quickly it can go from dry to saturated. If this is the case then just water very lightly to get that top layer hydrated again. Make sure your pots have lots of drainage holes but even then you will be amazed how quickly a hibiscus plant’s roots can plug up those drainage holes. Don’t be afraid to clear them out periodically or pot up to a larger size pot.
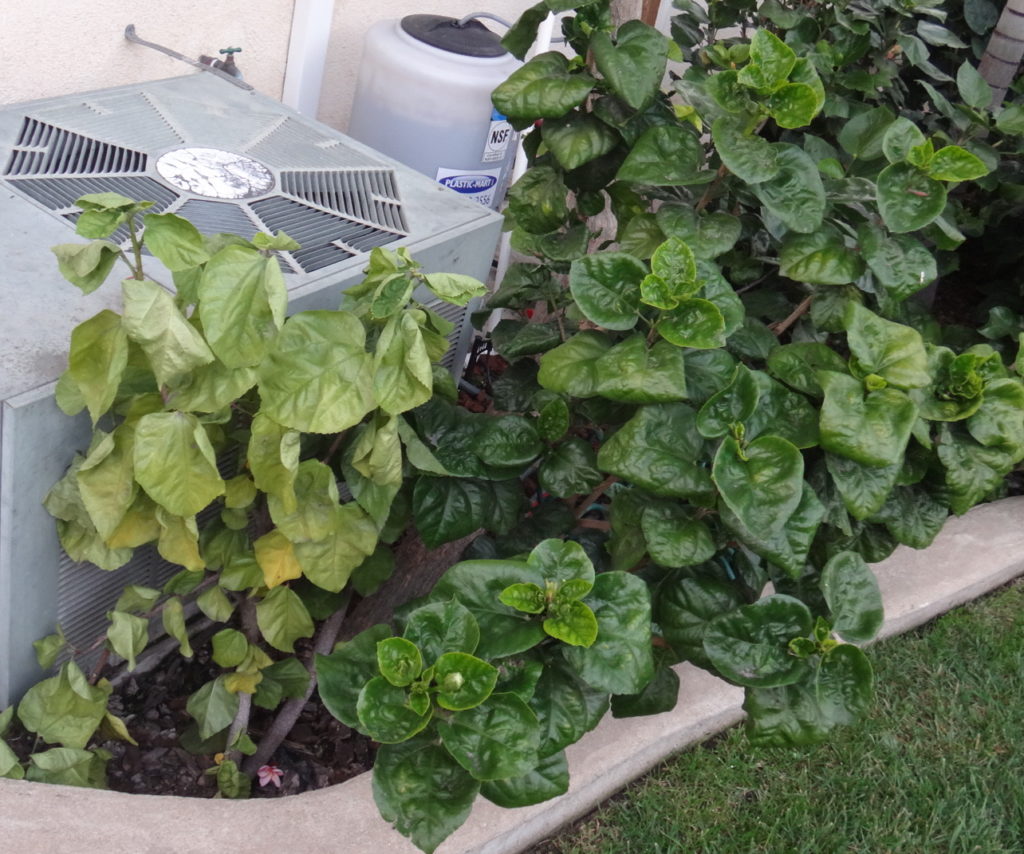
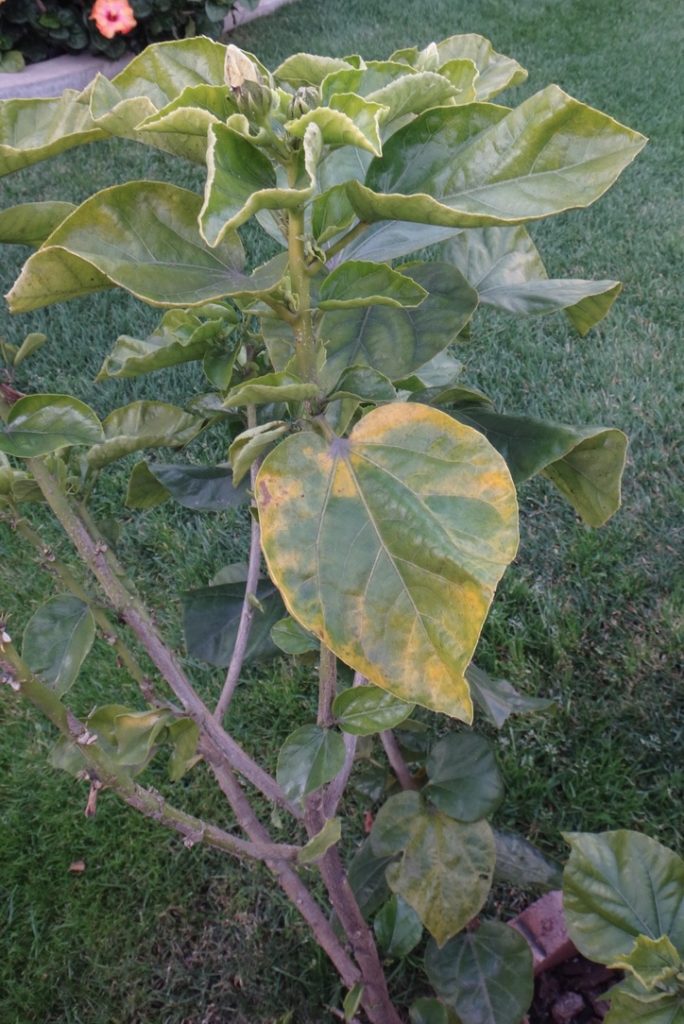
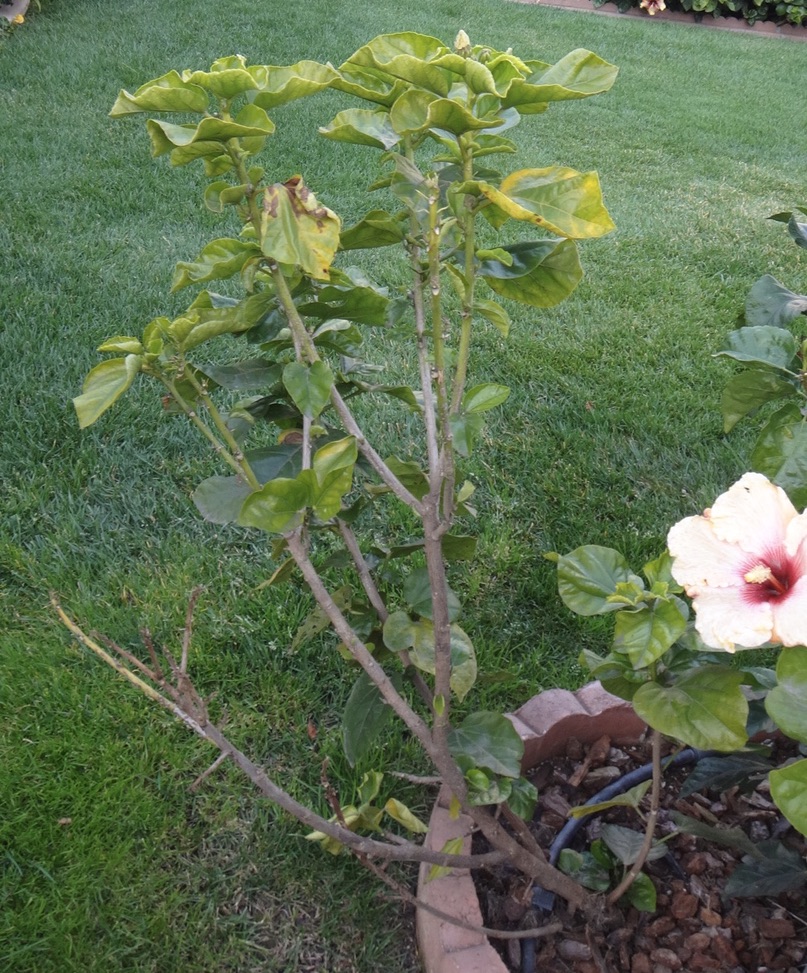
Always look at the top leaves on branches first before watering
Another great way to gauge if your plant is getting too much water and not enough air in the soil is to observe the top leaves on the branches. If they are coming out pale and veiny that means you do not have enough air in the soil which most times is from too much water. Not having the right soil mix and not enough potassium are the other reasons for seeing those types of leaf appearances but typically it is from not enough air in the soil. So when we are going to water our plants the first thing we look at before a drop hits the soil is the state of those top leaves.

Growing hibiscus, especially exotic hibiscus is not an easy task. It takes several years to start to get a feel for it and every location has it’s unique circumstances and conditions that will shift what is needed from other locations. And that changes throughout the year and with changing weather conditions too. What you did last year also might not work well the following year if our weather patterns change. Drought winters to wet ones and mild summers to scorching hot ones require much different approaches. An expert hibiscus grower is always watching the weather forecast and remembering what happened 2-3 weeks ago (The Golden Rule) to better assess what is needed. Patience and keen observations are key to correctly diagnosing what might be ailing your hibiscus plant.