Rooting
This is another fun and exciting component to growing hibiscus. Many of the traditional hibiscus root from their own cuttings and do so rather easily. The same cannot be said for exotic hibiscus. For many decades now hybridizers have ignored this characteristic and as a result a majority of exotic hibiscus cultivars have to be grafted on to rootstock since they cannot root on their own. The one exception to this is Charles Black of Hidden Valley Hibiscus who made it one of their requirements that all plants they would hybridize have the ability to root on their own. This in our opinion has been the saving grace of the hibiscus world as they have introduced an entire gene pool of high quality exotic hibiscus plants that can root. These genes can now be passed down to future generations and increase the likelihood a plant can root. There also seems to be a strong correlation with a plant that is strong and vigorous and having the ability to root.
Rooting Media
To successfully root hibiscus cuttings you need to have a location that provides the optimal conditions that hibiscus need which is temperatures in the 75-90F range and the same percentage humidity. Yes this is true for everything you do for hibiscus – they are unable to do anything specialized like this without perfect conditions. The two best options for creating optimal conditions for hibiscus is to create an indoor growing area where you can completely control the climate or use a pod tray with a high dome and heat mat.

Root Plugs
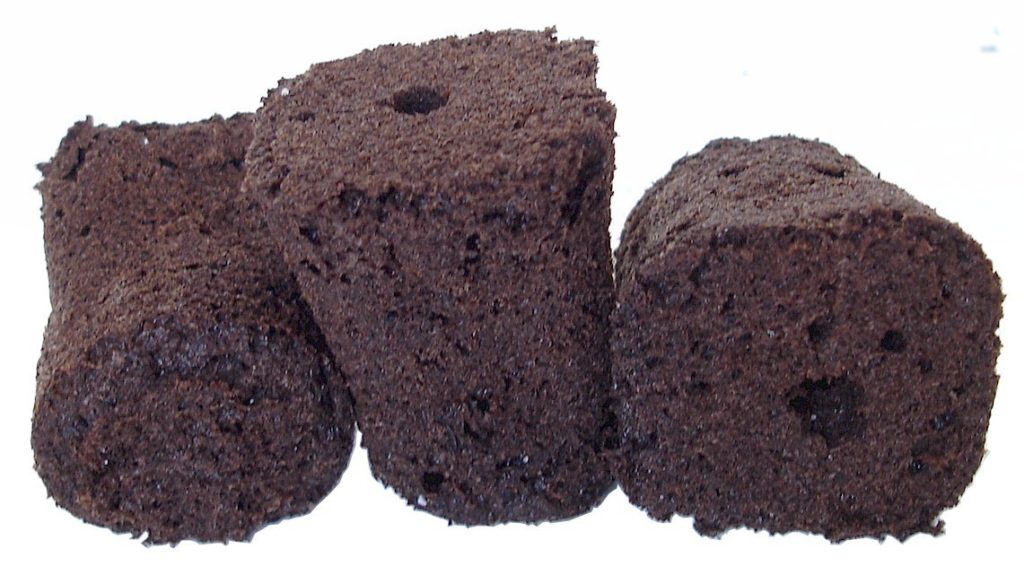
With the invention of root plugs the process of rooting has become much easier to successfully pursue. Root plugs provide a medium where a cutting will not fall over and break its roots as well as providing a source of air to the part of the cutting under the soil so it will have a decreased chance of rotting. Once a cutting starts to root, plugs also are great at protected the roots from being damaged as they can anchor into it. There are quite a few different types to choose from so depending on your situation and resources you might need to try several different types until you figure out what works best for you.

Rooting Hormone Powder/Gels
This is the last and final media component you need to successfully root hibiscus cuttings. The first thing you need to get is the hard to root strength hormone powder or liquid. Our members have observed there is a difference in results for rooting when using these. Some brands will have labels that might say for woody and hard to root plants while others go by a number system where the higher the number the stronger the rooting hormone product. Like everything else exotic hibiscus don’t take the easy way so you will need the strongest version you can find.
As for deciding on gel or powder both can work and the main factor comes down to how wet the conditions will be for you cutting. Some of our members have seen that using rooting gels in constantly wet conditions can lead to rot and the cutting dying. The upside to gels is that it will stick to the cutting better than a powder can. But to compensate for this when you are using a rooting powder the trick is to get ample amounts inside the precut hole of the root plug first before inserting the powdered end of your cutting into it. This normally ensures there will be sufficient rooting powder in contact with the surface of the cutting to activate the rooting process.

Selecting the Right Type of Cutting
This is the other critical element of the rooting process. The wood from a hibiscus plant you choose for a cutting is key to maximizing the chances of success. Do not use green wood that is located near the end of your branches as the base of your cutting. Also the thickness of a cutting should not be much larger than an oversized pencil. Ideally a pencil sized diameter is good. You want to cut from the section of a branch that is the silvery smooth bark which is located before it starts to transition to the green branch ends. Some plants’ branches that do not have new green growth are then good to cut at any point as long as it is not too thick. It is fine to include the green part all the way up to the branch tip as long as the base is woody and firm. The less bumps and nodes the better for rooting but don’t be afraid to root a cutting that is packed with nodes and looks all gnarled up. All those bumps creates an uneven surface area that can make it hard for a callous layer to form where the roots will emerge from.
Once you have chosen where to make the cut on your plant use a pair of strong and sharp sheers so that you get a clean cut without any splintering. Also ensure your cut will be straight and not on an angle. Once you have made your cut inspect the cross section of wood to ensure the interior is white and/or bright green only. Any black, brown or yellow areas are an indication the wood might be diseased and will lead to an unsuccessful attempt of rooting.
Next step is to remove all leaves, buds and other branches from the cutting. This is important as all those items provide ways for the moisture inside the cutting to escape. Once a cutting starts to lose moisture it is in big trouble as it has no way to pull up anymore. Quite a few of our members will seal all open areas where leaves, buds and branches were to keep the maximum amount of moisture inside as well as prevent any dry rot from starting up in those spots. You can use any plant product designed to seal open areas like natural tar, wax, commercial plant sealant, etc…
Plugging Your Cutting
This part is fairly straight forward. Make sure if you are using humidity domes your cutting is not too long and can fit comfortably inside. We recommend an ideal length of around 6” for most cuttings whether inside a dome or not. Make sure you have ample amounts of powder inside the root plug hole before placing the powdered end of the cutting in when using powder.
If you notice the cutting is much larger than the precut hole you can take your pinky finger and insert it first and gently twist it around to enlarge the hole. Be careful to not go all the way through the plug and open up the bottom end.
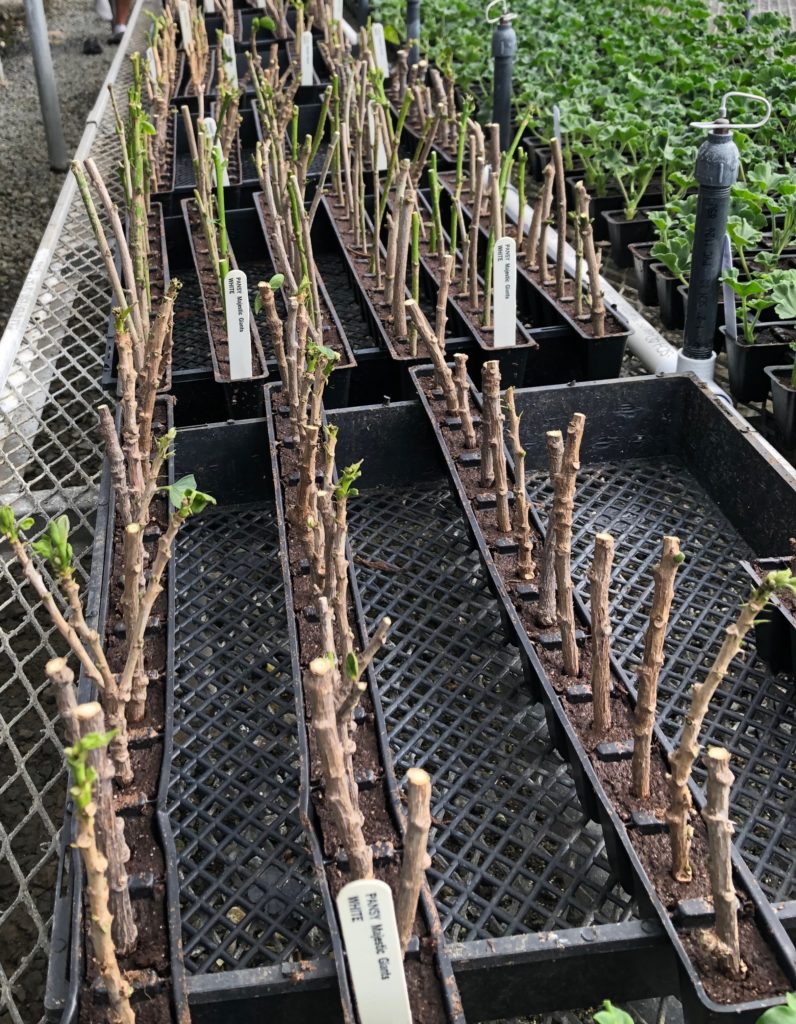
For tracking purposes this is when you will need to take action if you are rooting cuttings from more than one cultivar. You can write on the actual cutting, tag it or label the tray it is in. Nothing is worse than losing track of which cultivar a cutting came from and having to wait for it to bloom one day to know.
Caring for Cuttings While Rooting
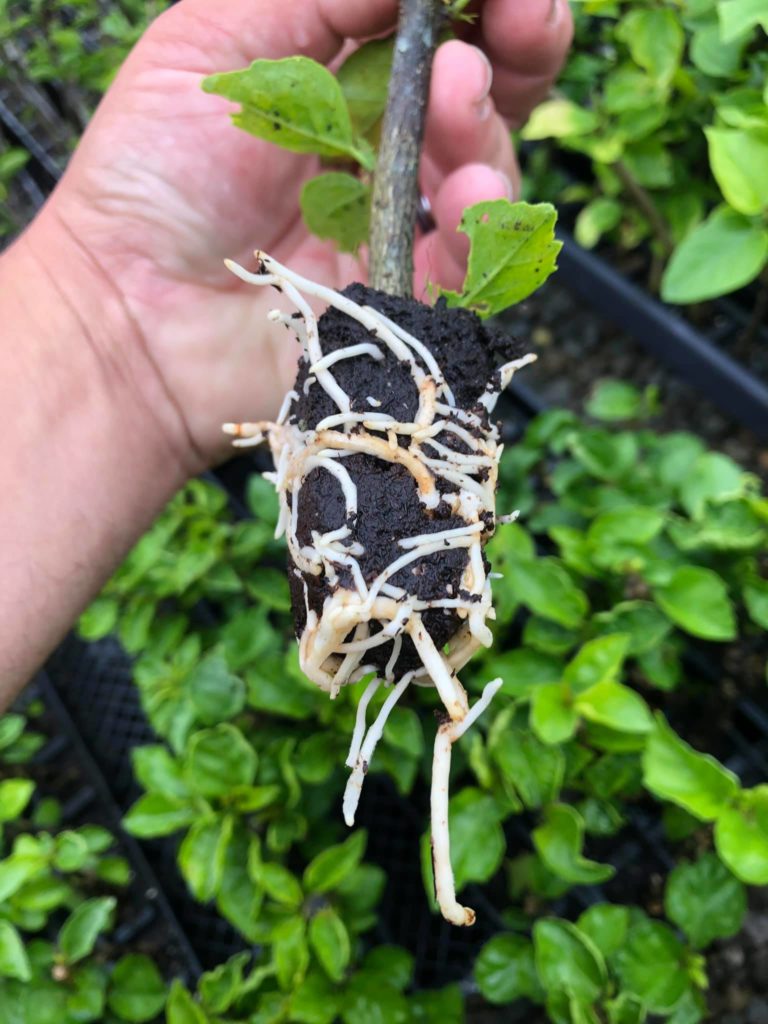
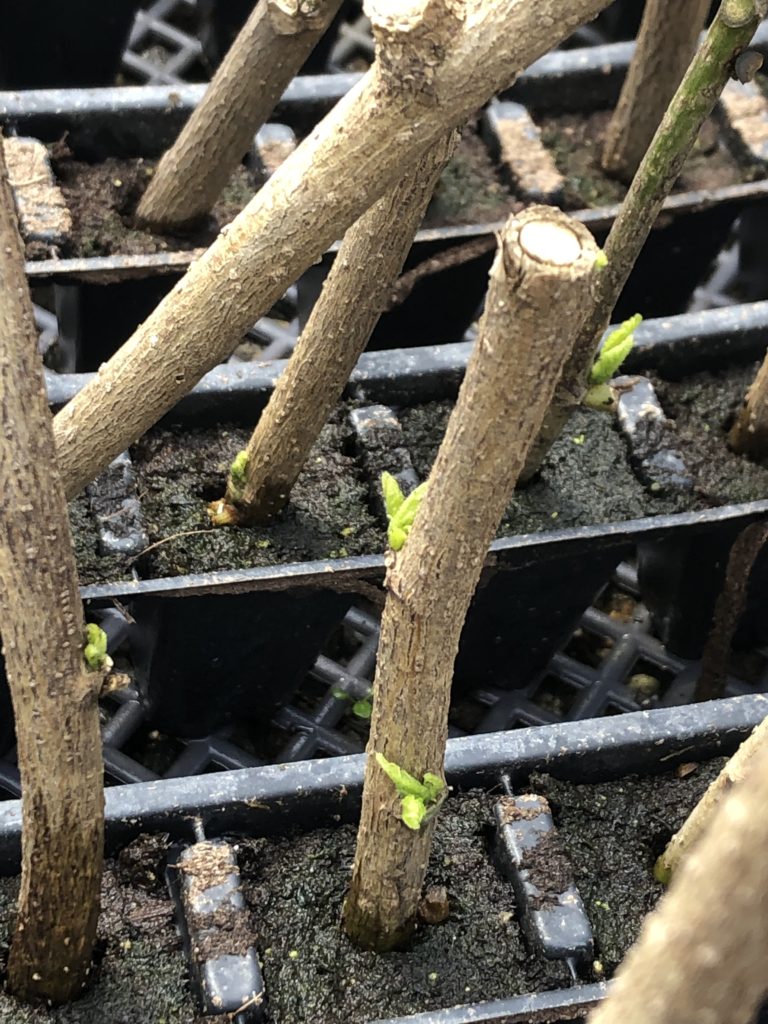
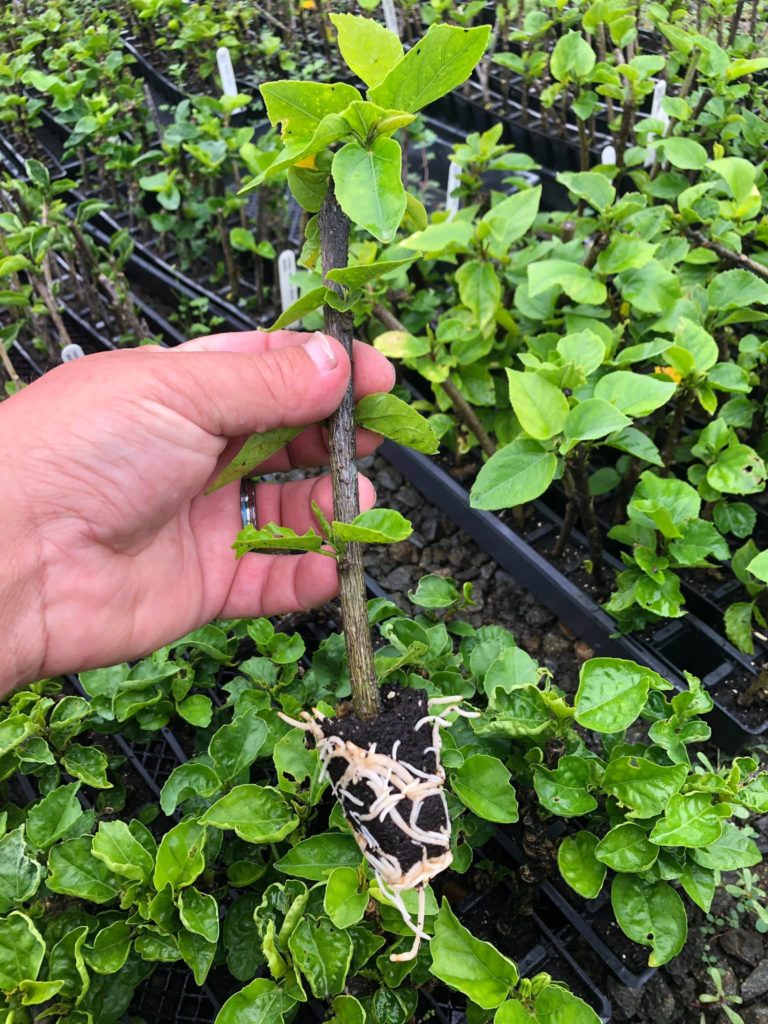
It normally takes 2 to 3 months for a cutting to start to successfully root. During that time your number one job is to keep you cuttings hydrated. This typically involved misting them with water as needed. Make sure the rooting plugs are not drying out but also not overly wet too as that will lead to rotting wood. Most times you will see your cuttings quickly start to grow out new leaves and branches even though it has yet to start rooting. This is perfect evidence of just how much hibiscus thrive in optimal conditions. It doesn’t take much for them to do their thing when they got the right temperatures and humidity. But don’t let this fool you, it takes time for the bottom of your cutting to form the callous layer which you can see as the wood starts to swell and bow out at the bottom. Don’t remove the cutting from the plug to check as that can break off any newly forming roots and likely stop any chance you have at rooting it. Bright white roots will eventually emerge but be patient as you need to see those roots start popping out of the sides of the root plug. Once you see at least several strong roots start making their way out of the cube do you then consider potting them up